
I’ve given up trying to give every blog post a title…so today it just has a date.
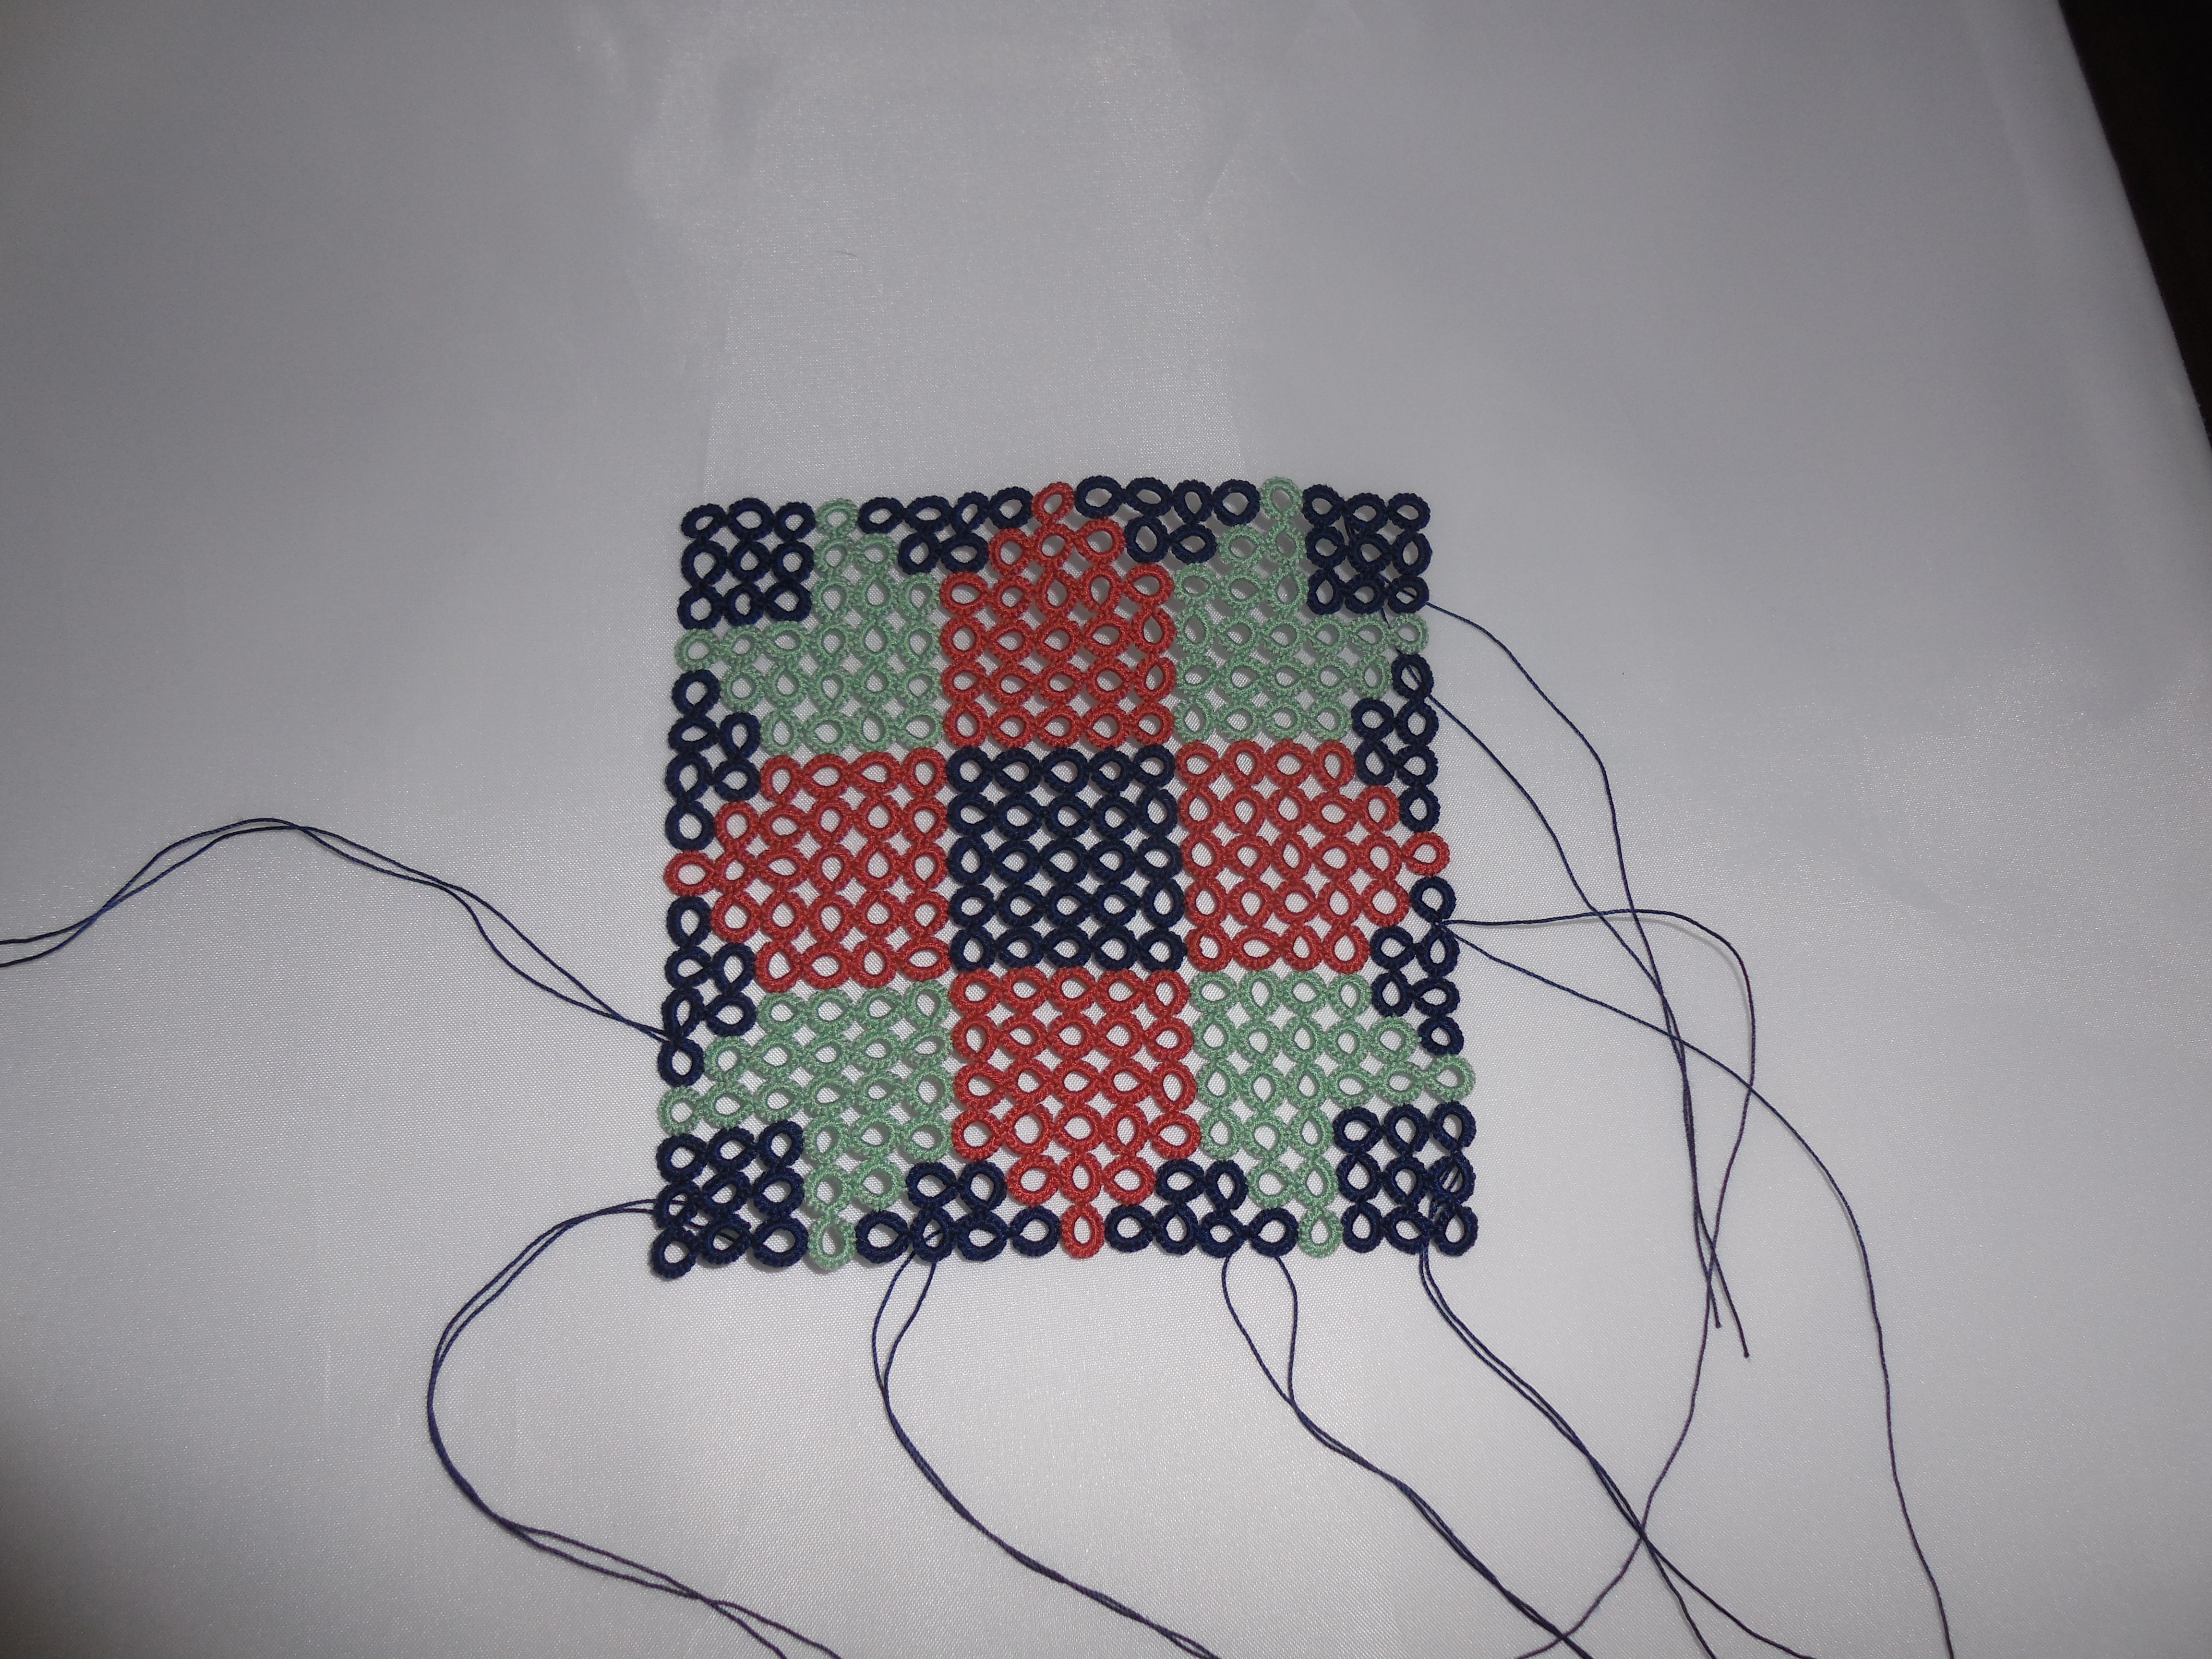
This is what I’ve been working on. The photos show the piece in progress.
The bottom photo shows how I rolled up the completed tatting to more easily work the last section. I used a safety pin (one of the things I always have in my tatting bag that goes everywhere with me!) to pin between the tatting (never piercing the actual thread work).
The top photo shows the piece tatted but still sporting ‘ends’ that need to be finished. You will note that there are two thread ends, not four, for each section/motif to finish. That is because I always start Continuous Thread Method (CTM)—but not always with both starting shuttles wound continuously with all the thread I need for the whole project. You see, I am innately lazy & frugal. I many times choose the color of thread for a project by what is still left on my shuttles from a previous project. I have little time to actually tat and thus don’t want to waste the time I can be physically tatting (as in creating the lace) by spending it winding shuttles. So IF I’m lucky I will have two shuttles of matching thread leftover with various amounts of thread on them that I use—but they are NOT continuous.
My Continuous Thread Method Strategy #1
I unwind at least a half-a-yard to one-yard of thread from one shuttle. I tie this thread end (overhand knot) to a thread end on a totally different shuttle (leftovers from yet another project—preferably in a different color). Wind the thread end onto the ‘other-thread shuttle’. You will now have two shuttles wound continuous.
Tat the project until you run out of thread on the ‘temporary shuttle’. Then do a Thread Replacement Strategy technique to swap out the depleted temporary shuttle with the other thread/shuttle you have ready for the project. The reason I choose a different color of thread on the second/temporary shuttle is so that you can visually see and thus gauge how much thread you have left to use before you need to do a ‘Thread Replacement Strategy’
This piece is one of many pieces that I have designed for the August 2015 IOLI Convention class that I am teaching titled Quilt-Inspired Fun with Split Ring Tatting. In that class I will be also be teaching a ‘side-class’ on Thread Replacement Strategies and Strategies for Dealing with Thread Ends (Starting & Ending). More about all of that in future blog posts!!!!