 THANK YOU to the knowledgeable tatters who recognized this pattern and told me not only in what book to find it but even what page! It was published in The Tatter’s Treasure Chest, edited by Mary Carolyn Waldrep, Dover Publications, NY, 1990. This was an out-of-copyright pattern republished by Dover Publications from a J. & P. Coats Tatting publication. The pattern can be found on page 78-79 of The Tatter’s Treasure Chest.
This is my shirt and how I added the tatting to it. Unfortunately I bought/used a cheap denim shirt that is now waaaayyyy too big for me. I tried wearing it about a month ago to go to a public tatting demo but it was just not right! I plan to introduce close-up photos & patterns of my variations of the original pattern and how/where I used the pattern.
I will be contemplating removing the tatted lace from this shirt and resewing it to a new shirt!!!!
This is a big undertaking….I estimate that it will take many hours to do!
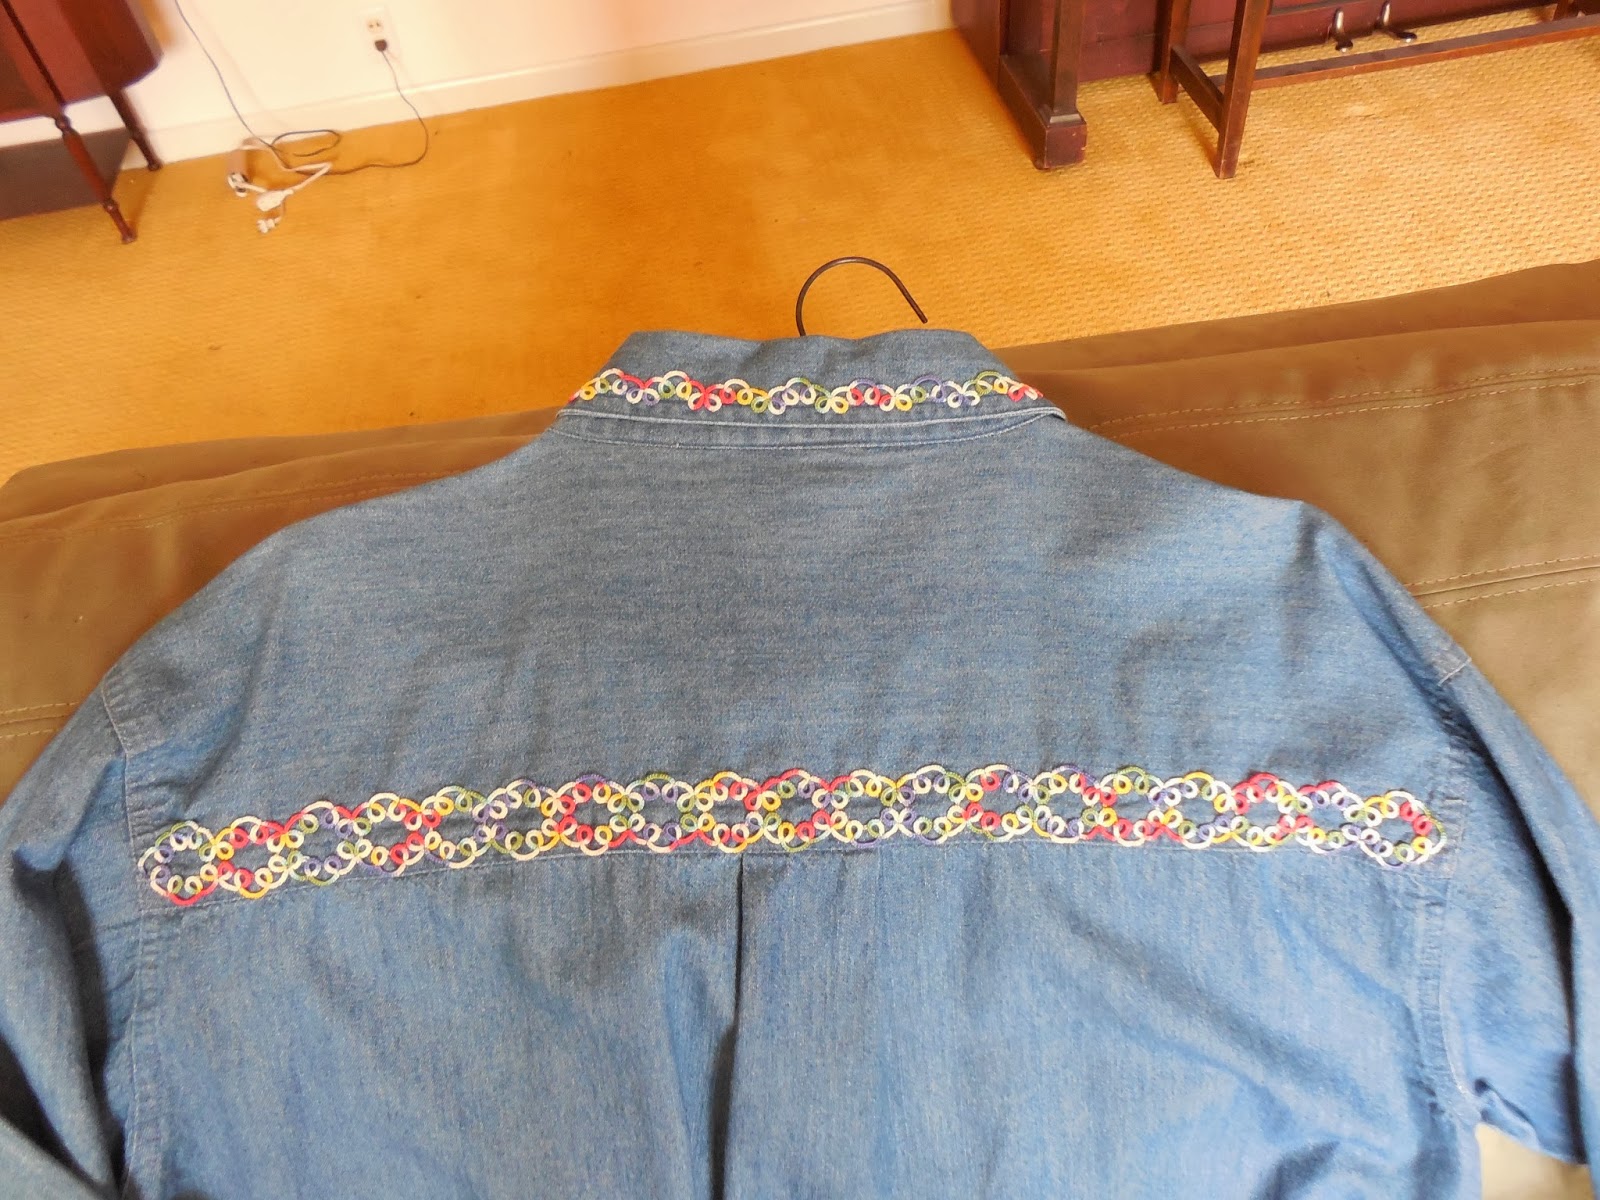
 This is the first variation of the edging pattern that I used to decorate one side of a button placket on a denim shirt.
It is tatted in two rounds. The first round is a (very slight) variation of the original design published in The Tatter’s Treasure Chest, edited by Mary Carolyn Waldrep, Dover Publications, NY, 1990. This was an out-of-copyright pattern republished by Dover Publications from a J. & P. Coats Tatting publication. The pattern can be found on page 78-79 of The Tatter’s Treasure Chest. Round 2 is created from a component of the upper edge of Round 1.
The following pattern is going to be in the form of an EDGING PATTERN.
Round 1 Pattern
This round can be tatted in one of two ways:
A. Using 2 shuttles.
B. Using one shuttle/ball of thread and the Shoelace Trick (switching the positions of the two thread sources).
R1: 11 – 6.
*
R2: 6 – 5 – 5.
RW.
Ch1: 8.
RW.
R3: 6 + 5 – 6 (to last p of prev R, R1).
RW.
R4: 6 – 5 – 6.
Ch2: 8.
RW.
Trefoil: R5: 6 + 5 – 6 (to p of prev R, R3).
R6: 6 + 10 – 6 (to p of prev R, R4).
R7: 6 + 5 – 6 (to p of prev R, R5).
RW.
Ch3: 8.
RW.
R8: 6 + 5 – 6 (to p of prev R, R7).
RW/Shoelace Trick.
R9: 6 + 5 – 6 (to p of R3).
RW.
Ch4: 8.
R10: 6 + 5 – 6 (to p of prev R, R8).
**
Repeat from * to ** until desired length.
Rx: 6 – 11.
Cut & Tie.
Round 2 Pattern
1 Shuttle/Ball of Thread–simple ring/chain tatting
R: 11 + 6 (to p of Rnd 1-R1).
R: 6 + 11 (to p of Rnd 1-R2).
*
RW.
Ch: 8
RW.
R: 6 + 5 – 6 (to p of prev R of Rnd 2).
RW.
Ch: 12
RW.
R: 6 + 5 – 6 (to p of prev R of Rnd 2).
RW.
Ch: 8
RW.
R: 6 + 5 + 6 (to p of prev R of Rnd 2, to next p of Rnd1).
**
R: 6 + 5 – 6 (to next p of Rnd1).
Repeat from * to ** until desired length.
Final R: 6 + 11 (to next p of Rnd1).
I used 6 repeats of the pattern for my shirt cuffs.
I hope this written pattern is correct! I haven’t written pattern directions this way for a long time….I’m an illustrated pattern kinda pattern writer/designer.

I used this triangle-shaped motif for the collar of my denim shirt project.
Round 1
*R1: 11-6.
RW
Ch: 8.
RW
R2: 6 + 5 – 5 (to p of R1).
Shoelace Trick/Switch thread position.
R3: 11 – 6.
RW
Ch 2: 8.
RW
R4: 6 + 5 – 5 (to p of R3).
R5: 6 – 5 – 6.
RW
Ch 3: 8.
RW
R6: 6 + 5 – 5 (to last p of R5).
RW
R7: 6 + 5 – 5 (to p of R2).
RW
Ch4: 8.
R8: 6 + 11 (to p of R7).
**
R9 to R16–Repeat from * to ** one time.
Cut & tie.
Round 2
R1: 11 + 6 (to p of Rnd1, R4)
R2: 6 + 11 (to p of Rnd 1, R5)
Ch1: 8.
RW
R3: 6 + 5 – 5 (to p of R1).
RW
R4: 11 – 6.
Ch 2: 8.
RW
Trefoil–R5: 6 + 5 – 6 (to p of R4).
R6: 6 + 10 – 6 (to p of R5).
R7: 6 + 5 – 6 (to p of R6).
RW
Ch3: 8.
R8: 6 + 5 – 6 (to p of R7)
RW/Shoelace Trick.
R9: 6 + 5 – 6 (to p of R3).
RW
Ch4: 8.
R10: 6 + 5 + 6 (to p of R9, to p of Rnd1, R12)
R11: 6 + 11 (to p of Rnd1, R13).