Category Archives: Uncategorized

Tatting Website I ‘FOUND’

Thought I’d point out a website that I ‘discovered’ through a post on HBT Yahoo Group.  The post pointed out an old (and fabulous!)  book by Judy Banashek in relation to a tatted cluny loom that she invented and sold probably 20 years ago.  (I need to write and article about Judy sometime in the future—she was a TRUE tatting innovator, before she suddenly dropped out of the tatting world.)  

The website is called LEIGH’S NEEDLEWORK & CRAFT BIBLIOGRAPHY. 

The author’s main expertise is in soft doll scupting and she has compiled a bibliography of meterials related to this subject with over 600 personally written reviews. It seems that she branched out from the doll world next into Tatting and this is where we benefit. According to her info, she has about 400 reveiws of Tatting materials (books, periodicals) published plust alot more listed on the site (not reviewed–yet).

When you open up one of the listings (press the REVIEW button), you will find the author’s personal summary/review of the book.  She also has a nice Table of Contents so you can better see what is in the book.   This is especially invaluable to someone like me who has waaaayyyy to0 many ‘pattern’ books but who loves ‘technique’ books.  (Actually I have most of the books that she has on her list anyway—YIKES!!)  But if there is a ‘technique’ book I may have missed, I might be able to discern this information from her printed Table of Contents.

If you follow this link it will take you directly to her bibliography of Tatting books, periodicals, etc.: http://www.somethingunderthebed.com/CURTAIN/TATTINGbiblio.html

This link takes you to the list of the bibliogaphies the author has compiled & has a button to get you back to the Home Page of the website:
http://www.somethingunderthebed.com/CURTAIN/BEHINDcurtain.html

In addition to Doll/Soft Scupting and Tatting she also has a less comprehensive start of biliographies for Candlemaking and Polymer Clay.  I am interested in reading her website further because she outlines how she got started in compiling these lists/biographies as well as why she feels it is important to write REVIEWS of the books and periodicals she has collected in this list.  She claims that her most important contribution with this website is the bibliography collection of magazines/periodicals and that “there is no other accessible database of this nature out there!”  The magazine bibliography is at the bottom of the page (past the books section).

I was pleased to see my two books Fun with Split Ring Tatting and MORE Fun with Split Ring Tatting in her bibliographic lineup with reviews!!!  (BTW, she DID like them!)

She also has a start to a section on Tatting Suppliers and future section under Professional Organizations.


The OTHER 2015 IOLI Class I am Teaching

DSCN1429

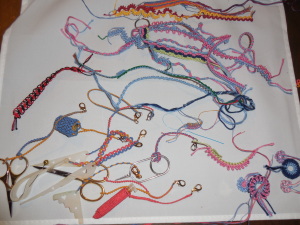
This is the pile of tatting that I have ready to block and photograph for the second class I will be teaching at the 2015 IOLI Convention this coming July/August in Iowa City, Iowa.

The class is titled Pearl Tatting Techniques (or something on those lines–the main concept is Pearl Tatting Technique). 

This picture is of the group of pieces that I have tatted and have a plan to block and photograph them later.

More about these pieces and the class in another post.

As a side, I am going to be leaving this weekend for a mini vacation to help my daughter drive from Omaha (where I live) to Denver where she is going to be starting grad school in Counseling at Northern Colorado Univ.  I’m taking a few extra days off of work (Mon. & Tues.) and will fly home Tuesday night.  I’m excited to get away for a few days.  Even though I driven THROUGH Denver many times, I really haven’t spent much time there and can’t picture what Denver really looks like (except for the I-70).  Probably won’t be too much Tatting related happening with me either here or in person.

Quilt-Inspired Tatting–Another Design Approach–3

DSCN1430
Diamond-Based Quilt-Inspired Tatting Designs

These are just the designs that I have tatted in my ‘Diamond-Based’ Series of Quilt-Inspired Fun with Split Ring Tatting.

There are a whole bunch more designs that can be done with this design principle using stacked diamond motifs that I have drawn/design into my design notebook and computer.

Even if I quit my full-time job, I could NOT keep up with tatting my designs!!!!  I pick and choose which ones I want/need to do during my lunch breaks and a few minutes in the evenings.  My time at home however is split between actually tatting and working on the computer, drawing the designs and the patterns themselves.  The good thing about my patterns is that they are all so geometric and mathematical.  I can draw a design and put stitch number in between picots and as long as I can add the numbers up to equal the ring count total, it all works.  I use alot of geometry in my designing and pattern-making.

Not all designs work up into tatting though!  There are some quilt-block designs that won’t work up into tatting.  Maybe in the future, I will share some of these designs ideas that will never be tatting (as least in my hands).

The bottom 3 designs are directly attributed to quilting patterns

  • Bottom Left:  ‘Lucky Star’
  • Bottom Middle:
  • Bottom Right:  ‘Tumbling Blocks’

The Upper Left & Upper Right designs are sort of 3-D in appearance.  The use of thread colors and placement of the blocks tricks the eye into seeing them as blocks (imagine the kind you play with and stack).  I have written about the Upper Right design before in old blog posts:  Click here to open this blog post in a new window  

All of these Quilt-Inspired SRT designs will be published  in books by next August when I will be teaching a class on it at the IOLI Convention in Iowa City, Iowa.

Another Quilt-Inspired Approach to Tatting–Part 2

DSCN1428
Log Cabin
DSCN1431
Grandmother’s Flower Garden

This is The ShuttleSmith’s second ‘style’ of Quilt-Inspired Fun with Split Ring Tatting.

These two photos show interpretations of ‘Log Cabin’ and ‘Grandmothers Flower Garden’ quilt blocks using hexagonal split ring tatting motifs.  Each color block can be tatted continuously–I (Karen Bovard/The ShuttleSmith)  have worked out the path of the pattern for you.

There are a bunch more variations designed/planned, but not tatted into thread yet.  Offhand, I know that i have designs ready for  ‘Courthouse Steps’, a second form of ‘Log Cabin’, ‘Sienna Square’, and ‘Granny Square’.

I’m tatting as fast as I can!!!!  but am not keeping up with all the fun designs that I have waiting to be done.

These Quilt-Inspired Split Ring Tatting designs as especially fun because you get to play with COLOR.  We all have those great colors of thread stashed away (especially with the luscious choices Handy Hands gives us in the LizBeth thread line)—why not mix/match them together in various ways.   You can go the Coordinating route or the Contrasting route of color selections.


Quilt-Inspired Split Ring Tatting–1

Allow me to introduce to you MY  approach to interpreting Quilting in Tatting:

I have several approaches to incoporating quilt-inspired designs into tatting, specifically Split Ring Tatting.   This morning I did a quick count of the pieces that I have done and I have 4 distinct styles of Quilt-Inspired Tatting Designs.

The design-type that I am finishing up at the end of this year is what I call my “Patchwork Series”. 

A Patchwork Quilt is created by sewing together smaller ‘pieces’ of fabric into a larger ‘block’ of fabric to create a basic design unit.  Historically the different ‘blocks’ had names that date back to pioneer days.

To recreate quilt blocks in my Tatted Patchwork Series, I use ‘square-rings’ (a term coined by another designer to designate rings created with 4 DS, picot, 4 DS, picot, 4 DS, picot, 4 DS) created using Split Ring Tatting technique to ‘stack’ them one upon another, in right angles to one another,  to form a ‘piece’.  Then the ‘pieces’ (in different colors) are joined together to form ‘blocks’.  I have been studying historical quilt blocks (the fabric kind) to discern the pattern of the block and then creating my own ‘pieces’ and ‘blocks’.

PATCHWORK Tatted Quilt Designs: L–‘Double Pinwheel’, R–‘Weathervane’.

The two tatted blocks above are the two that I have done (tatted)–not finished nor blocked!  Yikes—I really need to work on my photography skills!
Don’t be too daunted by the all the ends that will need to be finished (at least 2 per ‘block’)—they can be brought to the back of a piece of fabric and tied off, concealing the ends.  More about that later!!!


Continuous Thread Method–my tip

Did I mention before that I am innately lazy!?!?!

I am also short on tatting time–meaning that because I work full-time, time available to me to tat is veeeeerrrrry limited.

Combine these two things and you learn that I have developed ways to cope with tatting techniques ‘in my own way’  (as we all have!).

I love to start a tatted piece/block/round/etc. with Continuous Thread Method (CTM) because:

  • There are not 2 starting thread ends to have to finish.
  • The start is more stable/structurally sound

Thus as I was tatting this morning (just before starting work) I stopped to shoot this picture showing my approach to CTM.

DSCN1455
My approach to CTM technique

In this case today I was starting fresh with a new thread color–in the process of winding two shuttles CTM.  What I do is wind the first shuttle.  Then I unwind an appropriate amount of thread (for the second shuttle) onto the first shuttle.  But I add an extra twist to it by using 2 pieces of plastic (that I keep in my tatting pouch) on either side of the shuttle.  These pieces of plastic will not allow the thread to slip off the rounded/slanted edges of my shuttle.  Then I cut the thread from the ball and wind this thread end onto my second shuttle.  In the past, when I didn’t use these plastic pieces, as I was winding the thread onto the second shuttle, the thread would slip off the first shuttle and I would end up with tangles of thread which would really frustrate me.

My designs seen at Tatting Corner Workshop

DSCN1394
Contest Entries at Tatting Corner Tatting Workshop–September 2014

I am sooo excited whenever I see one of my designs tatted by someone else!!!!

This was the case at The Tatting Corner Tatting Workshop in September 2014.

There was a display table of pieces entered into various contests.  Two pieces were tatted from my designs.

The first piece  was a celtic design from my second book, MORE Fun with Split Ring Tatting.

DSCN1395

The second piece was my Cornucopia design from a workshop I taught probably 10-15 years ago.  The Cornucopia body was created using interlocking rings and interlocking chains.

DSCN1396

The vegetables were designed at my request by Debbie Arnold to teach at the same workshop.

The Pattern that won’t work

3-D Tatting Art 4IMGP4130.jpg

I have been planning and contemplating a large piece of tatting that I termed my ‘art-piece’ for about a year or more now:

  • I had it sketched out on graph paper.
  • I consulted my art-major daughter about esthetics of my design.
  • I tried to find just the right threads—colors and size.  In the process of this, I decided that I just ‘had to have’ Anchor Cordonnet–color light grey, black and then a bright accent color.  The grey colored thread was the ‘weak-link’ in the system.  I could get it in size 10, so I tried it….but decided that Size 10 was just too bulky.  I HAD to have Size 20.  The only place (that I could find) to get all the colors in the size of thread that I wanted was from ENGLAND.   So I paid an enormous sum of money to order it from England.  Thus is sat for a while waiting for me to get the project.

Then about about a month ago, I sat down to actually start the piece, only to realize that I had miscalculated the design layout!  What I wanted to tat would simply NOT work!!!  I had misdrawn it the first time.  ARGGHHH.

The design is based upon a series of designs that I have drawn/designed on paper and several that I have tatted already for my Quilt-Inspired Split Ring Tatting class and book.  It was supposed to have a 3-dimensional appearance even though it is completely flat (2-d).  I have an example of this concept already done.  The design idea works to a certain level….but not all the way I want it to.

img100

There is a whole lotta designs that can be done that I am still discovering.  Many will be featured in one of my Quilt-Inspired Fun with Split Ring Tatting books and classes.


5 December 2014

DSCN1424
‘Weathervane’ Quilt-Block Split Ring Tatting—To Be Finished
DSCN1421
View of how I ‘deal’ with tatting a larger piece

I’ve given up trying to give every blog post a title…so today it just has a date.

This is what I’ve been working on.  The photos show the piece in progress.

The bottom photo shows how I rolled up the completed tatting to more easily work the last section.  I used a safety pin (one of the things I always have in my tatting bag that goes everywhere with me!) to pin between the tatting (never piercing the actual thread work). 

The top photo shows the piece tatted but still sporting ‘ends’ that need to be finished.  You will note that there are two thread ends, not four, for each section/motif to finish.  That is because I always start Continuous Thread Method (CTM)—but not always with both starting shuttles wound continuously with all the thread I need for the whole project.  You see, I am innately lazy & frugal I many times choose the color of thread for a project by what is still left on my shuttles from a previous project.  I have little time to actually tat and thus don’t want to waste the time I can be physically tatting (as in creating the lace) by spending it winding shuttles.  So IF I’m lucky I will have two shuttles of matching thread leftover with various amounts of thread on them that I use—but they are NOT continuous.

My Continuous Thread Method Strategy #1

I unwind at least a half-a-yard to one-yard of thread from one shuttle.  I tie this thread end (overhand knot) to a thread end on a totally different shuttle (leftovers from yet another projectpreferably in a different color).  Wind the thread end onto the ‘other-thread shuttle’.  You will now have two shuttles wound continuous.

Tat the project until you run out of thread on the ‘temporary shuttle’.  Then do a Thread Replacement Strategy technique to swap out the depleted temporary shuttle with the other thread/shuttle you have ready for the project.  The reason I choose a different color of thread on the second/temporary shuttle is so that you can visually see and thus gauge how much thread you have left to use before you need to do a ‘Thread Replacement Strategy’

This piece is one of many pieces that I have designed for the August 2015 IOLI Convention class that I am teaching titled Quilt-Inspired Fun with Split Ring Tatting.  In that class I will be also be teaching a ‘side-class’ on Thread Replacement Strategies and Strategies for Dealing with Thread Ends (Starting & Ending).  More about all of that in future blog posts!!!!

Another cool historical SRT pattern 4 free

14 #8

Here is Number 8 pattern from Anne Orr’s Book #14.

To get the pattern in PDF form:

Click on:  Ann Orr Historical Split Ring Tatting Patterns

Then choose:  The ShuttleSmith Illustrated Historical SRT Patterns

Scroll down until you find the one you are interested in. 

Then click:  Click here to open illustrated PDF Pattern

ENJOY THIS INCREDIBLE PATTERN!!!!