Just added 4 new Glass/Enamel Tatting Shuttles to my Etsy store: TheShuttleSmith
Coming Soon: Custom Enamel Shuttles with your monograms/initial(s)!!!!


Just added 4 new Glass/Enamel Tatting Shuttles to my Etsy store: TheShuttleSmith
Coming Soon: Custom Enamel Shuttles with your monograms/initial(s)!!!!
I have been determined to stay away from engaging in 3 things: bobbin lace, quilting, & beading. I KNOW I would enjoy doing all three. BUT I know that all three of these artforms require a considerable outlay of time and money for supplies/materials. In otherwords, these artforms can ‘consume’ a person such as myself. Thus, I have stayed focused first on tatting (and other things relating to tatting: designing, publishing, shuttle-making–sterling silver & enameling) and specialty needlework techniques including needlelaces.
However, once a year I go to the local rock club’s (which I just joined this year!) Rock, Gem & Mineral Show with a good friend. Once there, I am tempted and do buy some strands of natural beads. This same friend (Thanks Lisa L.S.!) also taught me how to turn my bead strands into jewelry using stringing/finishing techniques.
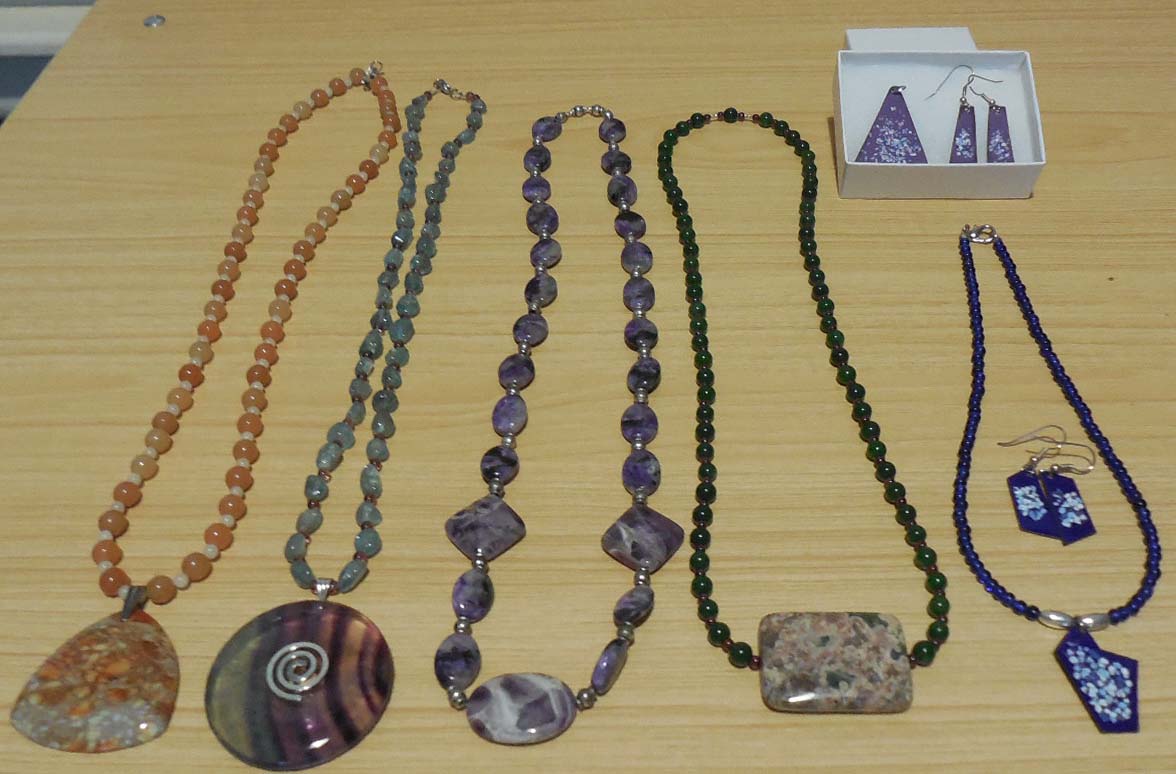
Just recently, I pulled out all the beads that I had strung and finished them into necklaces–the four from L to R.
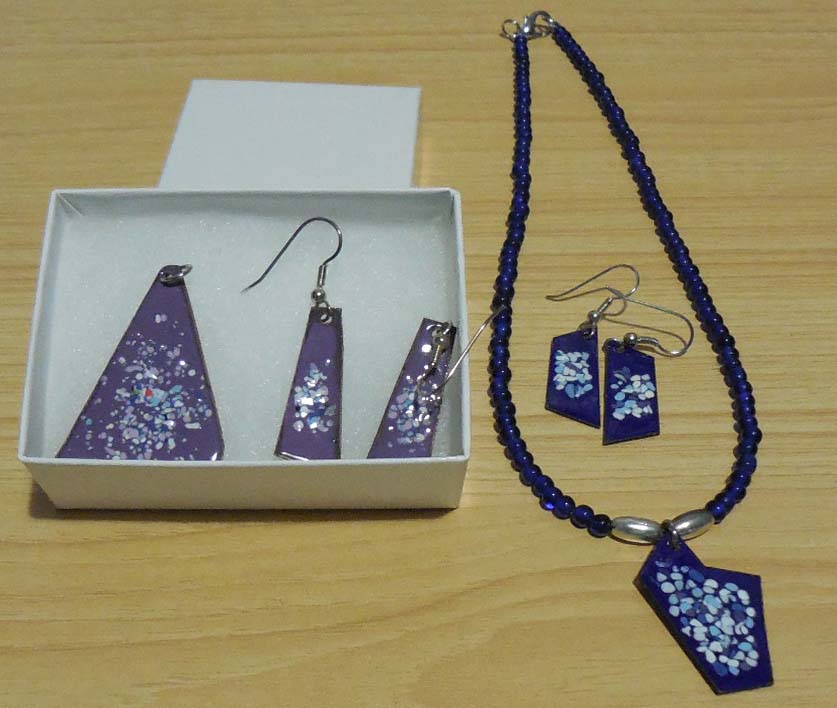
The bottom photo is of my handmade enameled jewelry. I have a cobalt blue blouse I wear the right set with. I still need to find the perfect outfit for the purple jewelry set.
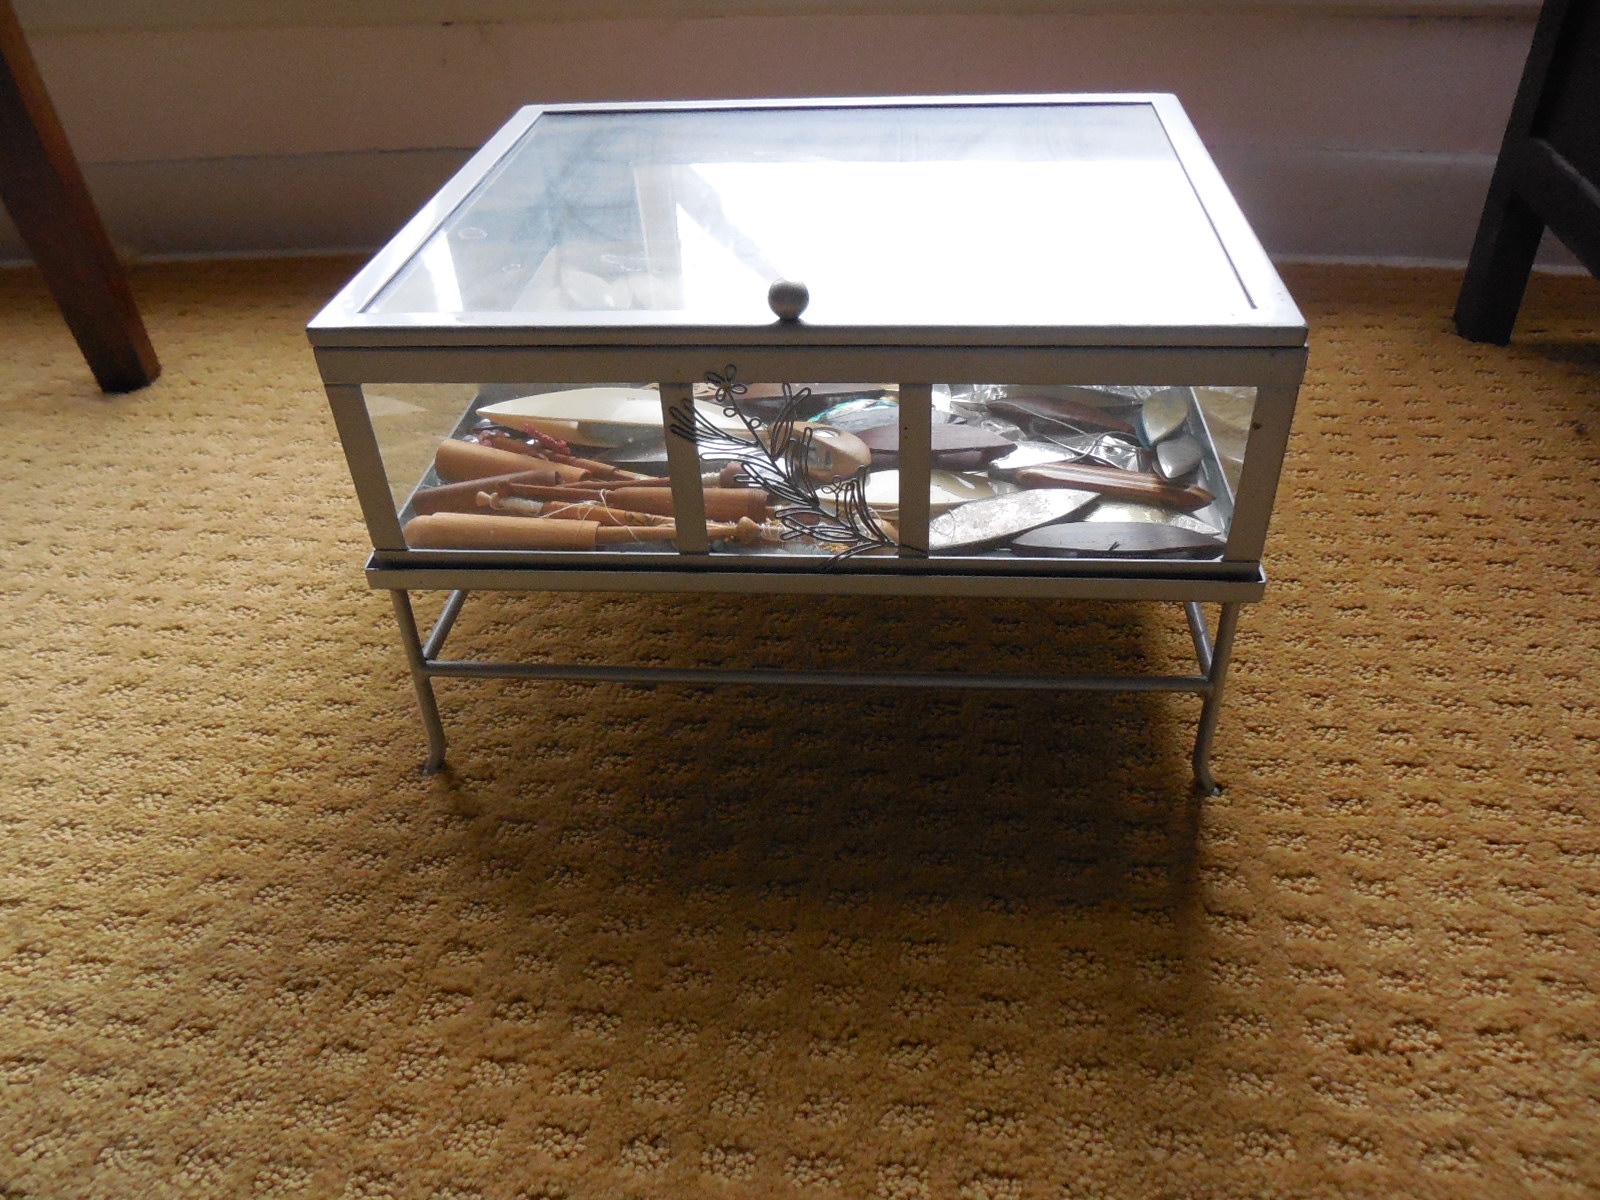
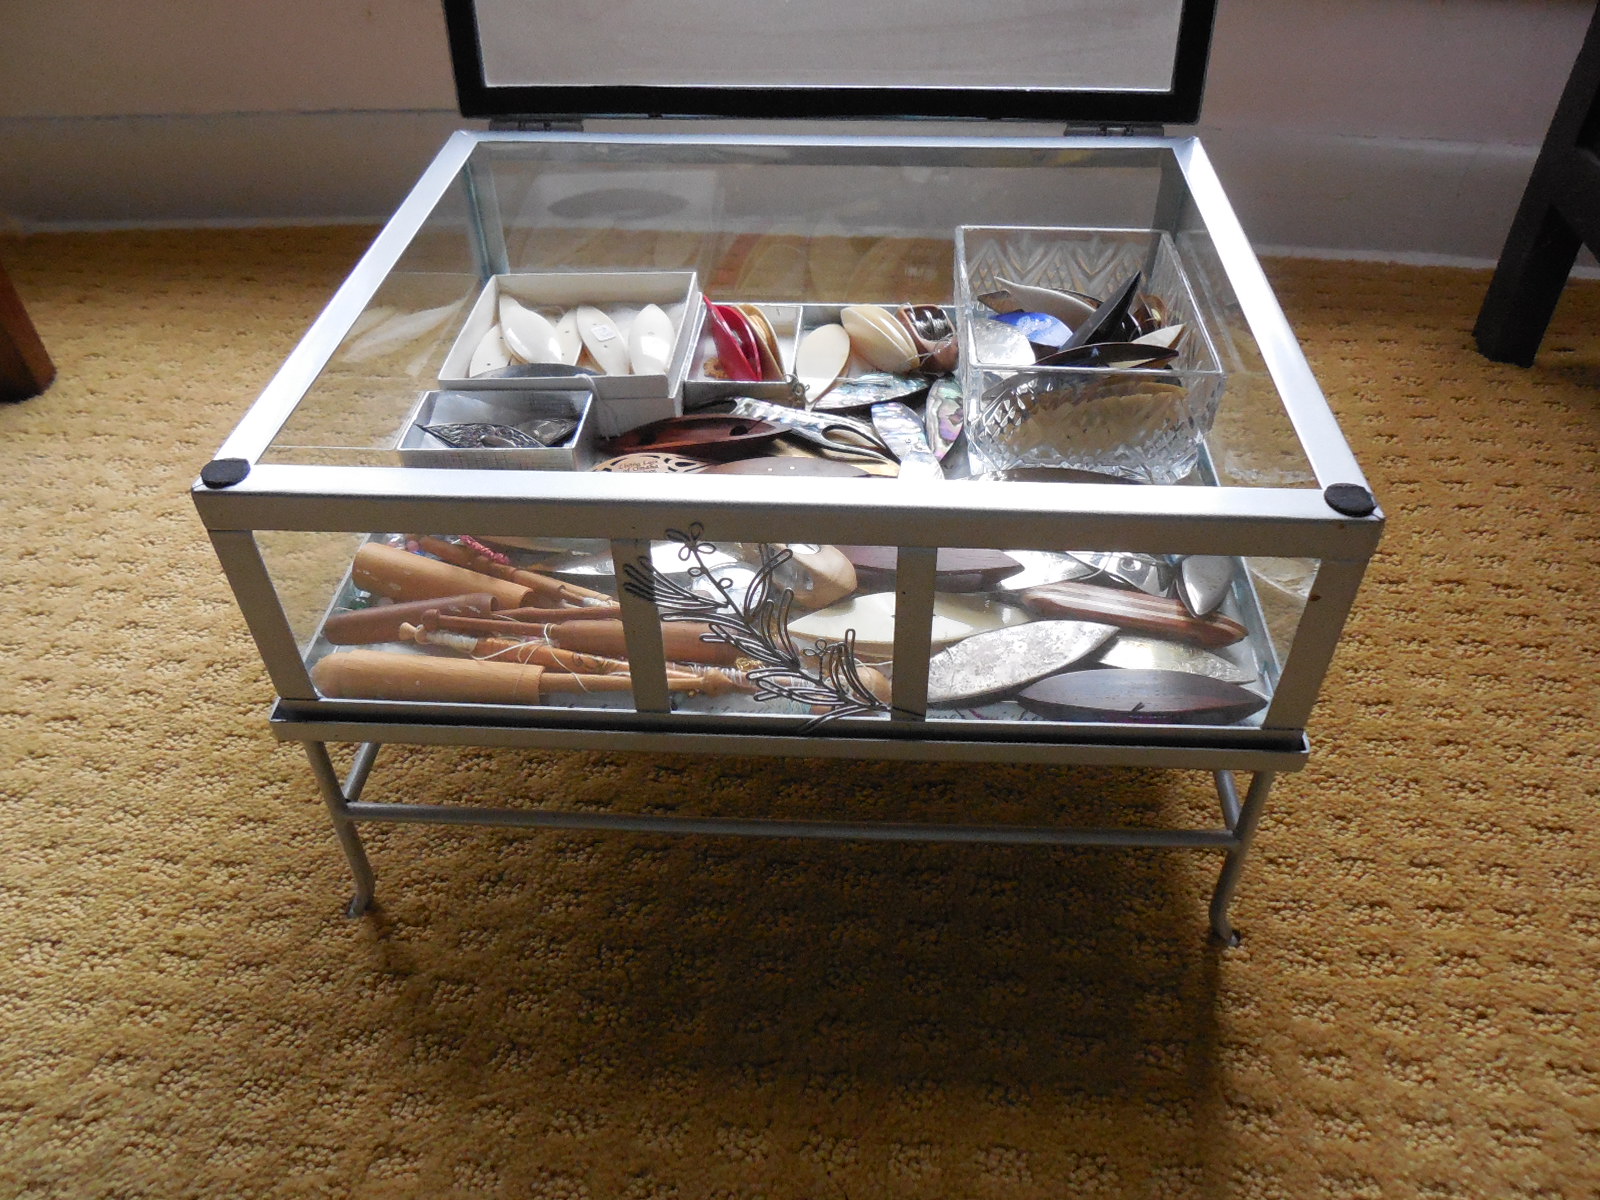

The photos shows what my tatting shuttle collection looks like. This is the glass case that I have and the reason why I didn’t buy any of the metal/glass boxes I found recently in The Pottery Barn store.
I have had this glass/metal box for several years now. I prompted my husband to buy it for me as a Mother’s Day present from this kids about 10-15 years ago. It was for sale in a Hallmark store. I actually got something that I wanted and liked that year for Mother’s Day!
I don’t consider myself a true tatting shuttle collector. I first started looking for shuttles about 30 years ago in antique stores while my husband I were traveling. I seemed always be there ‘the day after’ a really beautiful/unique one had sold previously. Later, I found out that my tatting friend Cindy Costantinou was probably the one who had gotten them! But I kept looking in the late 80’s and as the years progressed started seeing the prices of antique tatting shuttles rise quite dramatically. At one point when I had found a rather beautiful, but pricey, tatting shuttle and was contemplating its purchase, my husband told me that I needed to decide whether I was a ‘collector’ or not. I walked away from the purchase of that shuttle with the realization that I was a ‘Tatter’ not a ‘collector’. That decision saved me from spending a lot of money on a true tatting shuttle collection. However, I still enjoyed (and still do today) the hunt for tatting shuttles and will occasionally buy one IF the price is reasonable.
I am fairly pleased still today that I am not a true shuttle collector. The high prices that antique tatting shuttles (and other needlework tools) were going for in the late 80’s/early 90’s is not being realized today. The other issue I see with collecting antique tatting shuttles from an investment perspective is that there doesn’t seem to be a reference guide with prices that antique dealers and collectors can use (at least with my knowledge of the industry about 10-15 years ago). Sadly my friend, Cindy C. has passed away. Her brother has her collection. I am sure that he is not able to get the value that she paid for each piece.
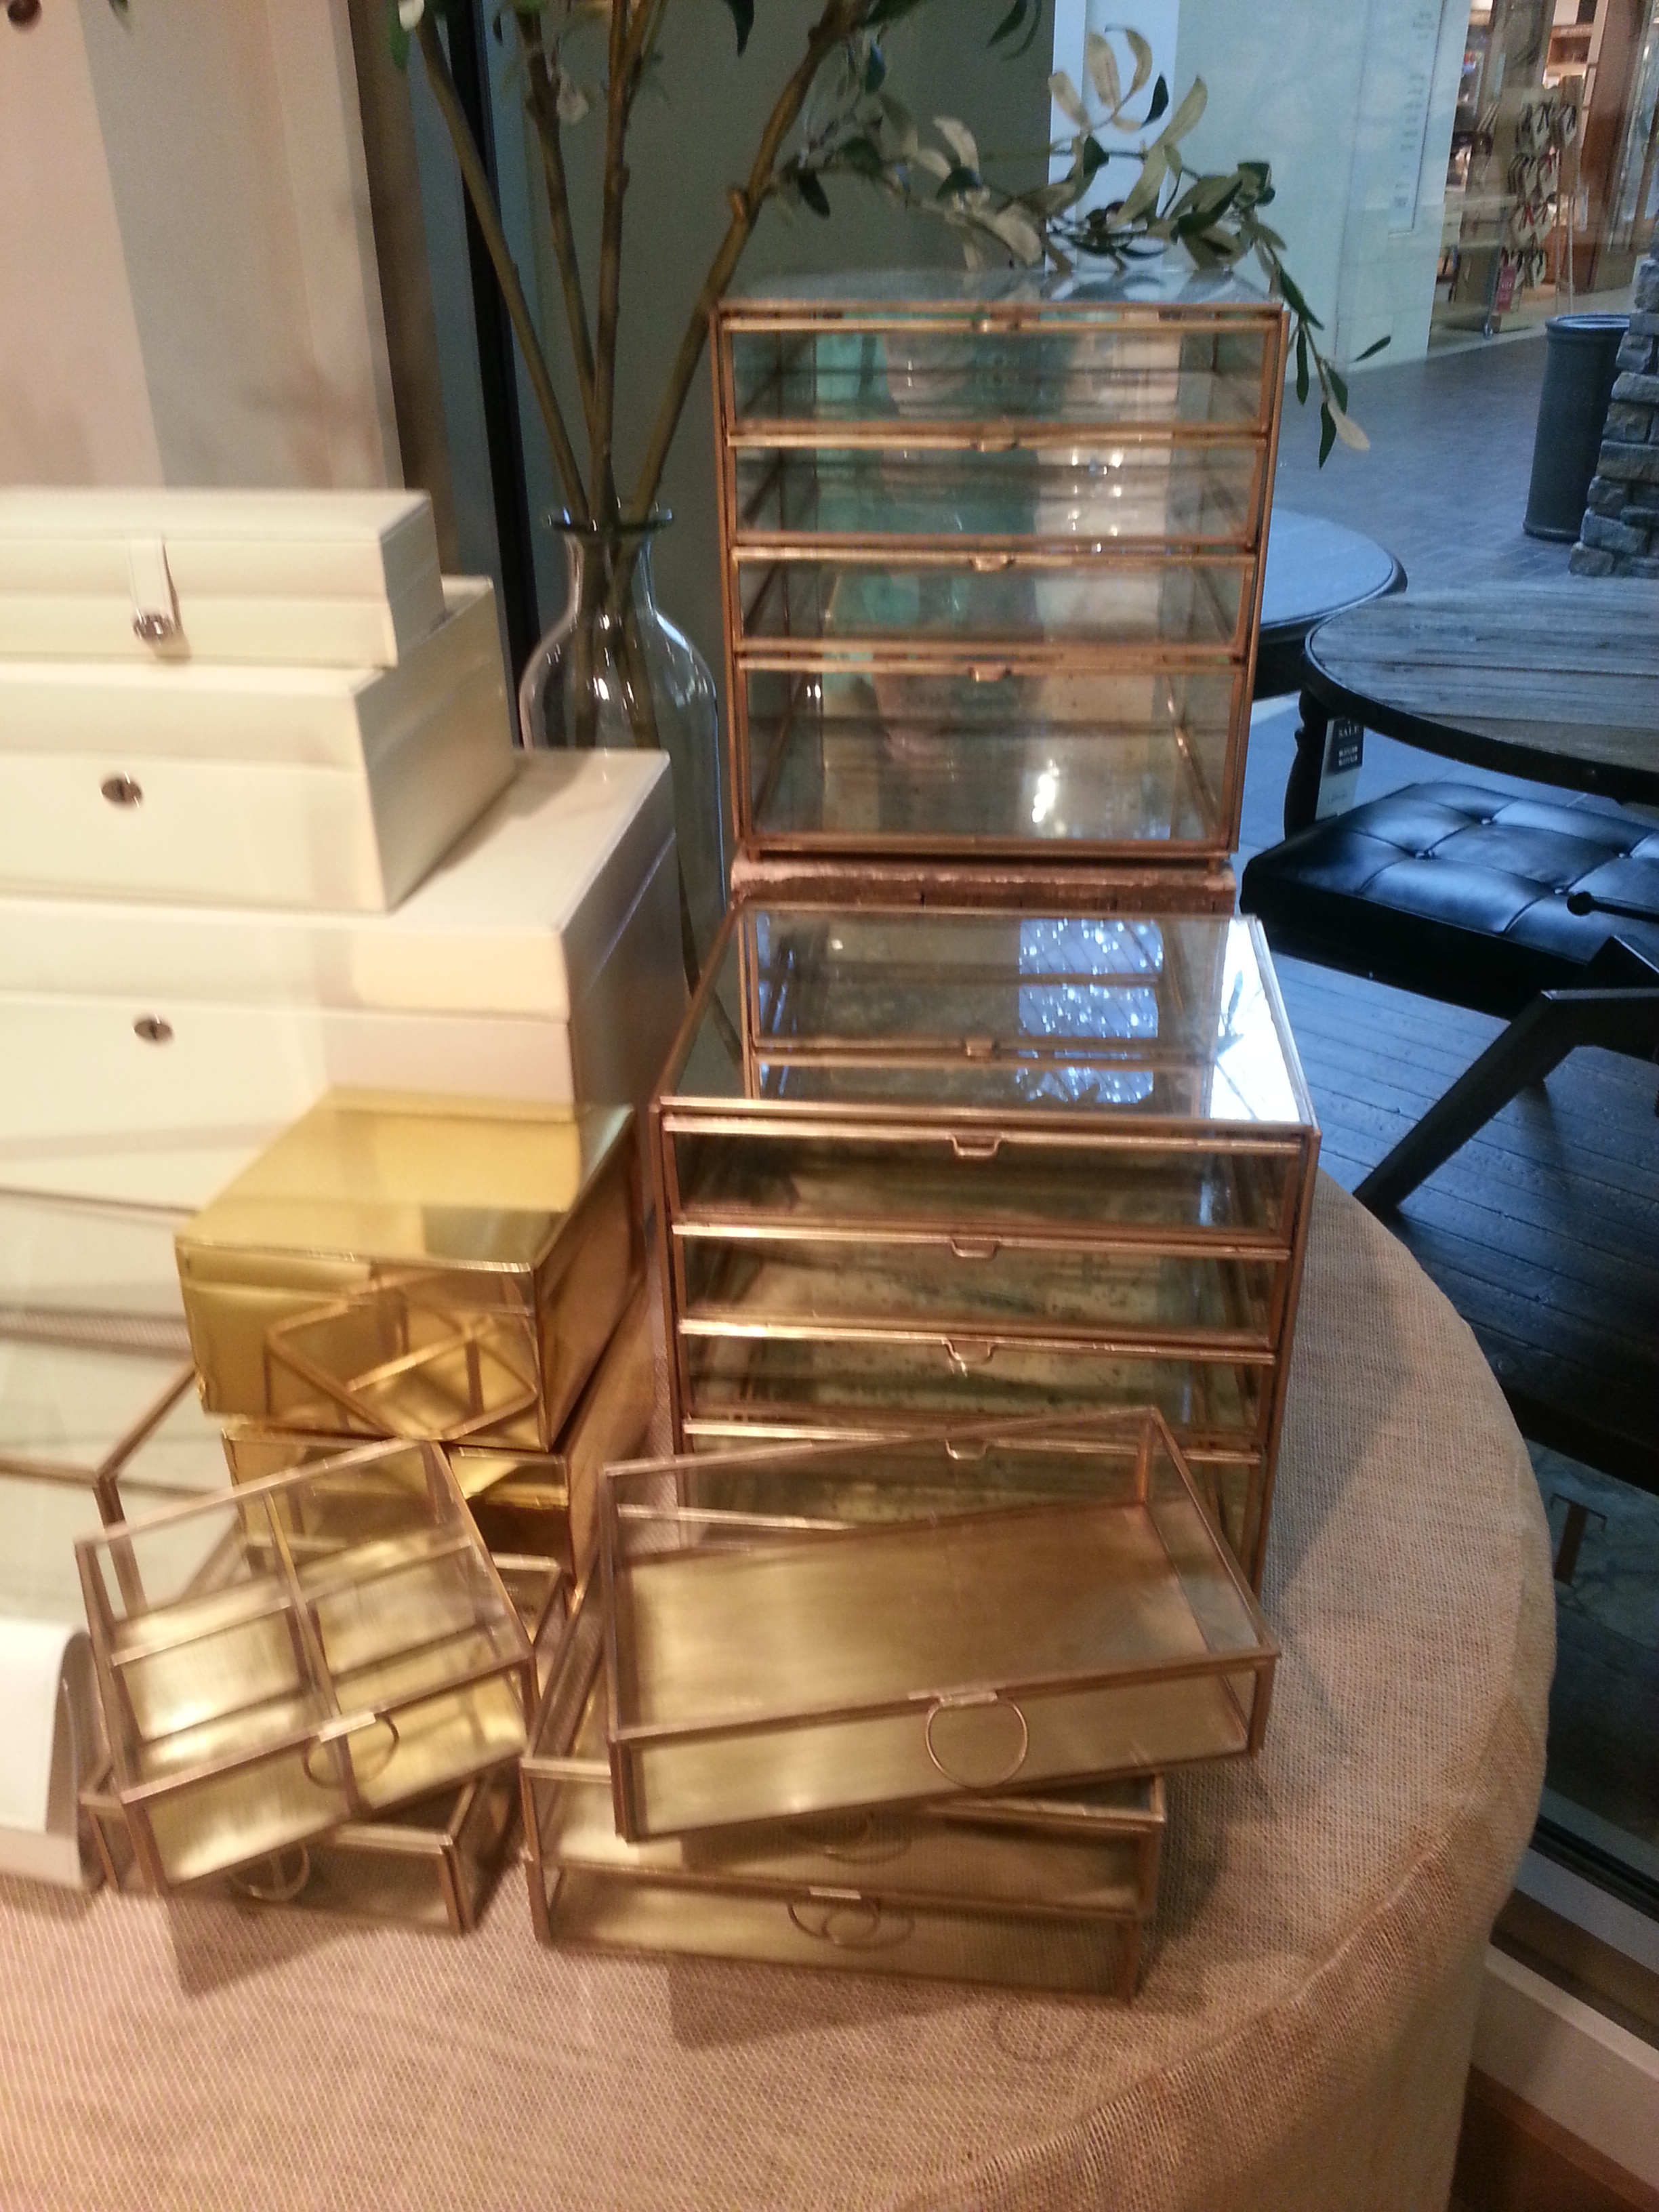
I was having coffee with the neighborhood women this morning and decided afterward to pop into some of the stores of the shopping mall.
I wandered into Pottery Barn mostly to look at colors (for my enameling work–can’t really justify their prices + I really don’t need anything!) and found these wonderful glass and metal boxes. They were being marketed as ‘jewelry’ boxes….but I saw their beauty as being ‘tatting shuttle collection’ boxes.


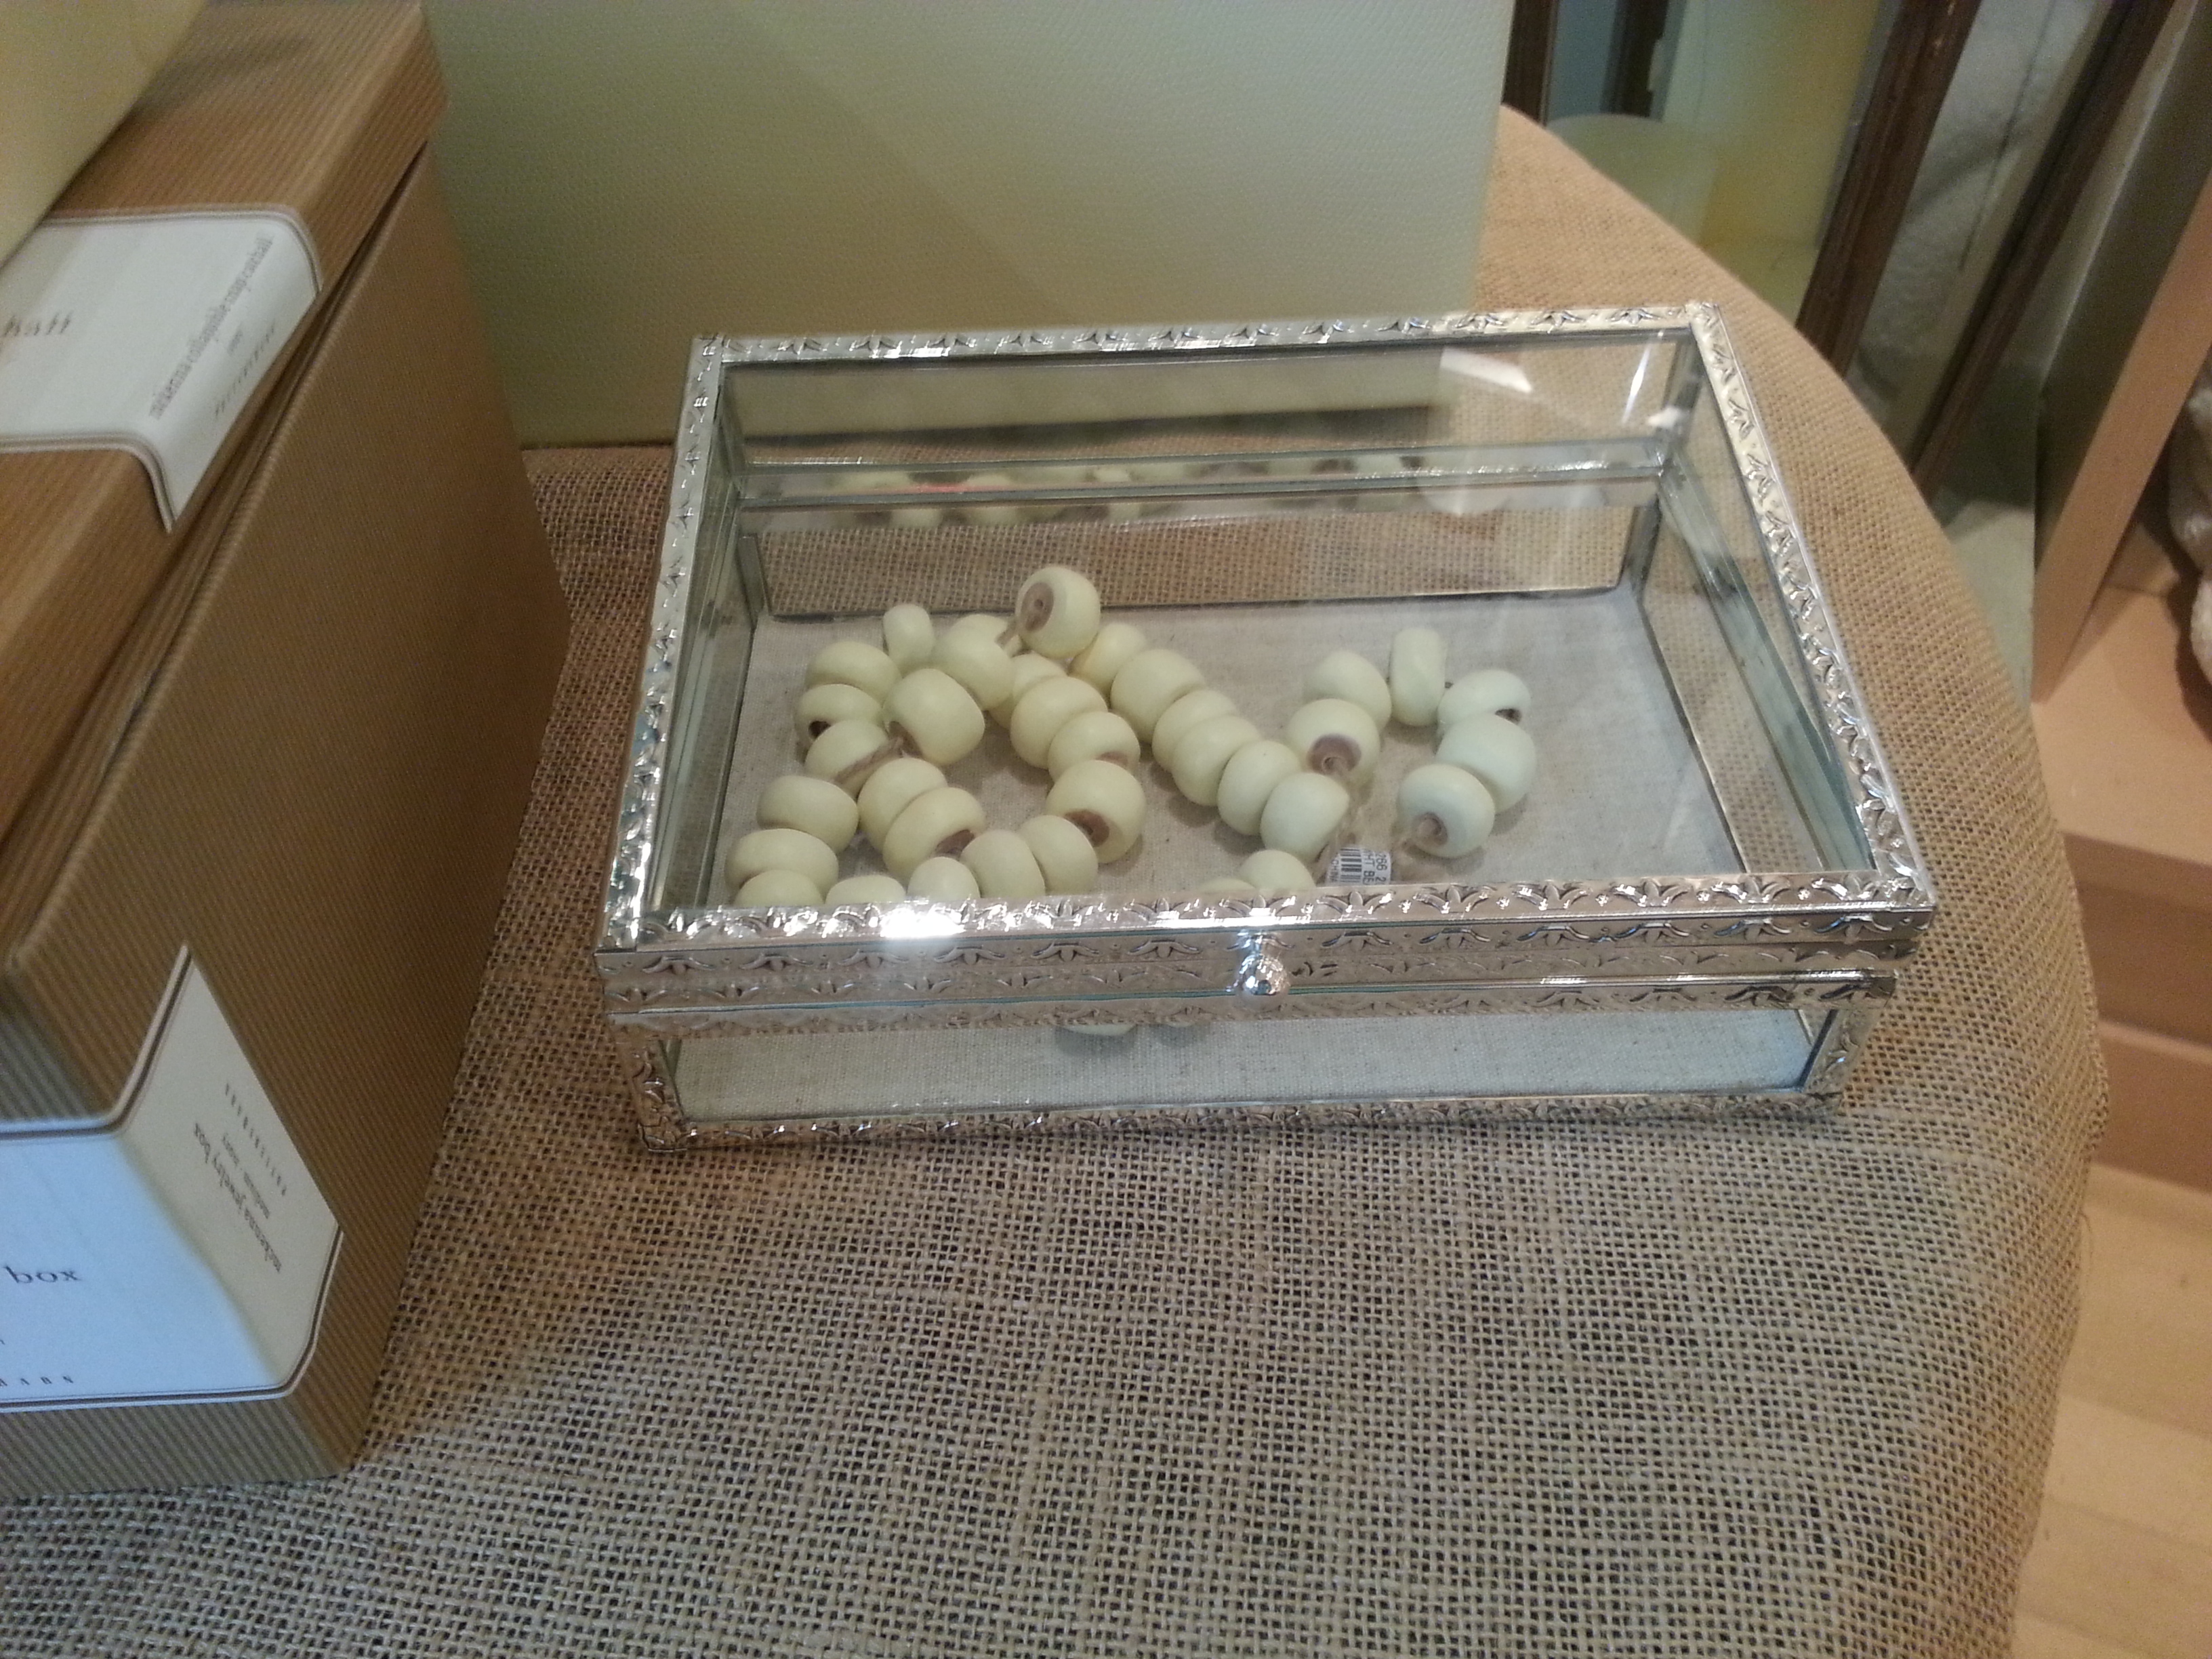

I actually already have a glass/metal Tatting Shuttle Collection Box. I had seen this years ago and told my husband, who bought it and let the kids give it to me for Mother’s Day.
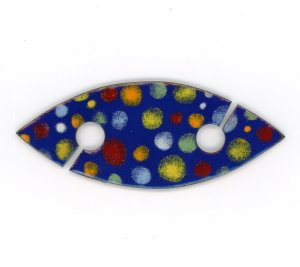
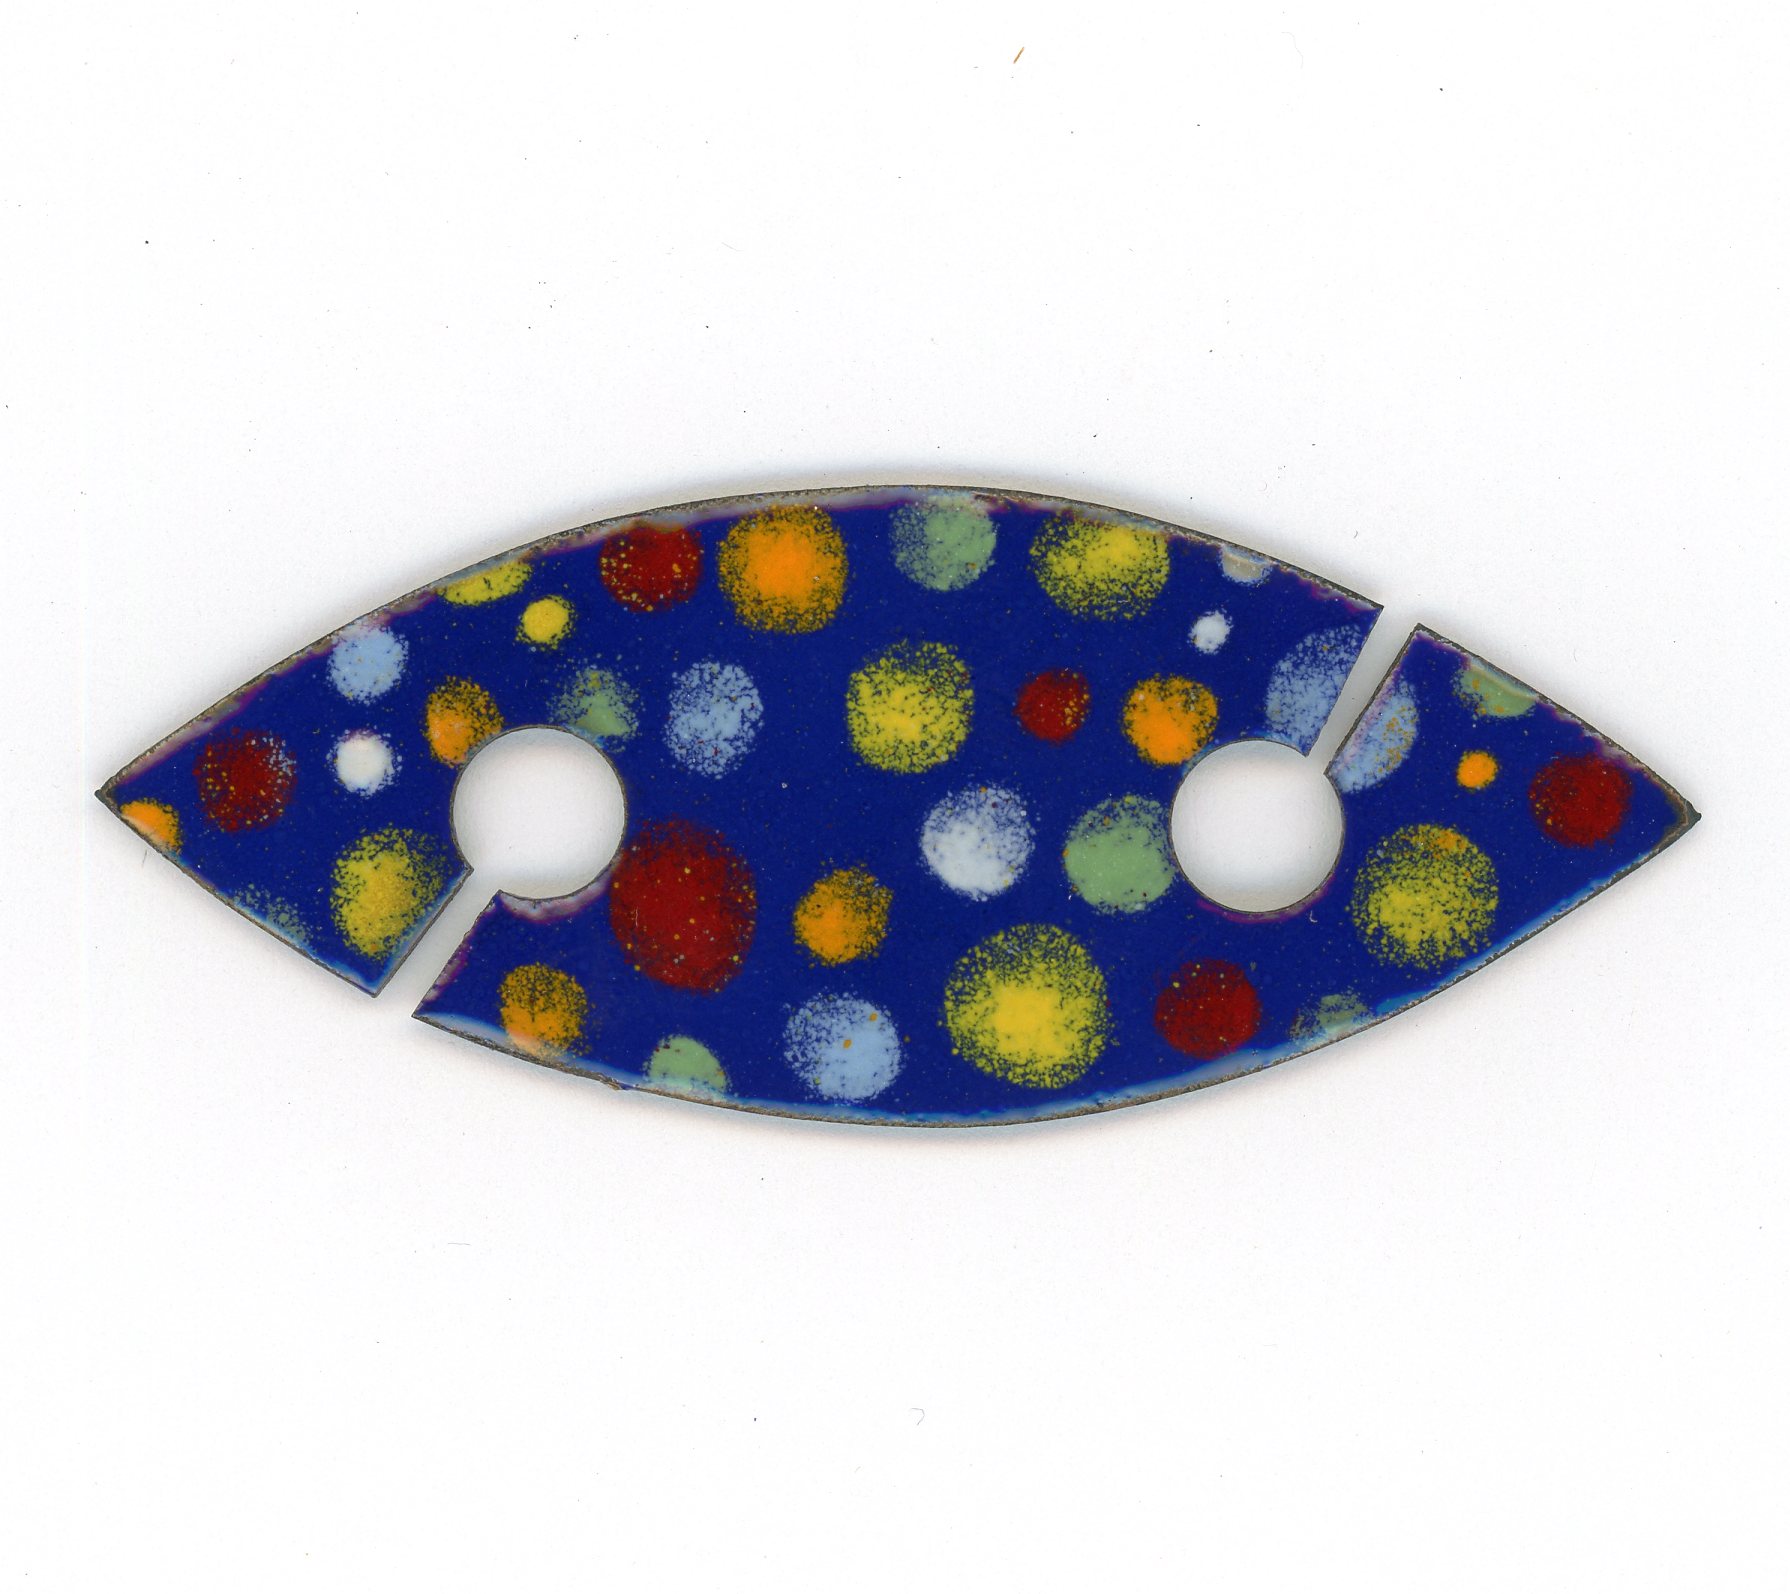
I just added a new enameled tatting shuttle to my Etsy store. It features multi-colored polka dots on a rich, dark blue base color

I was striving to having this book published by Easter in regards to its subject matter. But I realized that Easter is early this year. In addition, I am still creating 3 more what I call ‘just one more cross’ for the book. I have decided that once I get these 3 designs done, I’m going to call it ‘DONE’!!!!
Now I need a new deadline. Any suggestions?
What I did today INSTEAD of what I should have been doing today!!!
What I did today: I went into my Etsy Store site and added in some information about me and my shop items.
First of all, I chose one of my glass/enamel tatting shuttles to be my shop’s ‘logo’ image. I chose the one I named “The Shuttle of Many (Primary) Colors”.
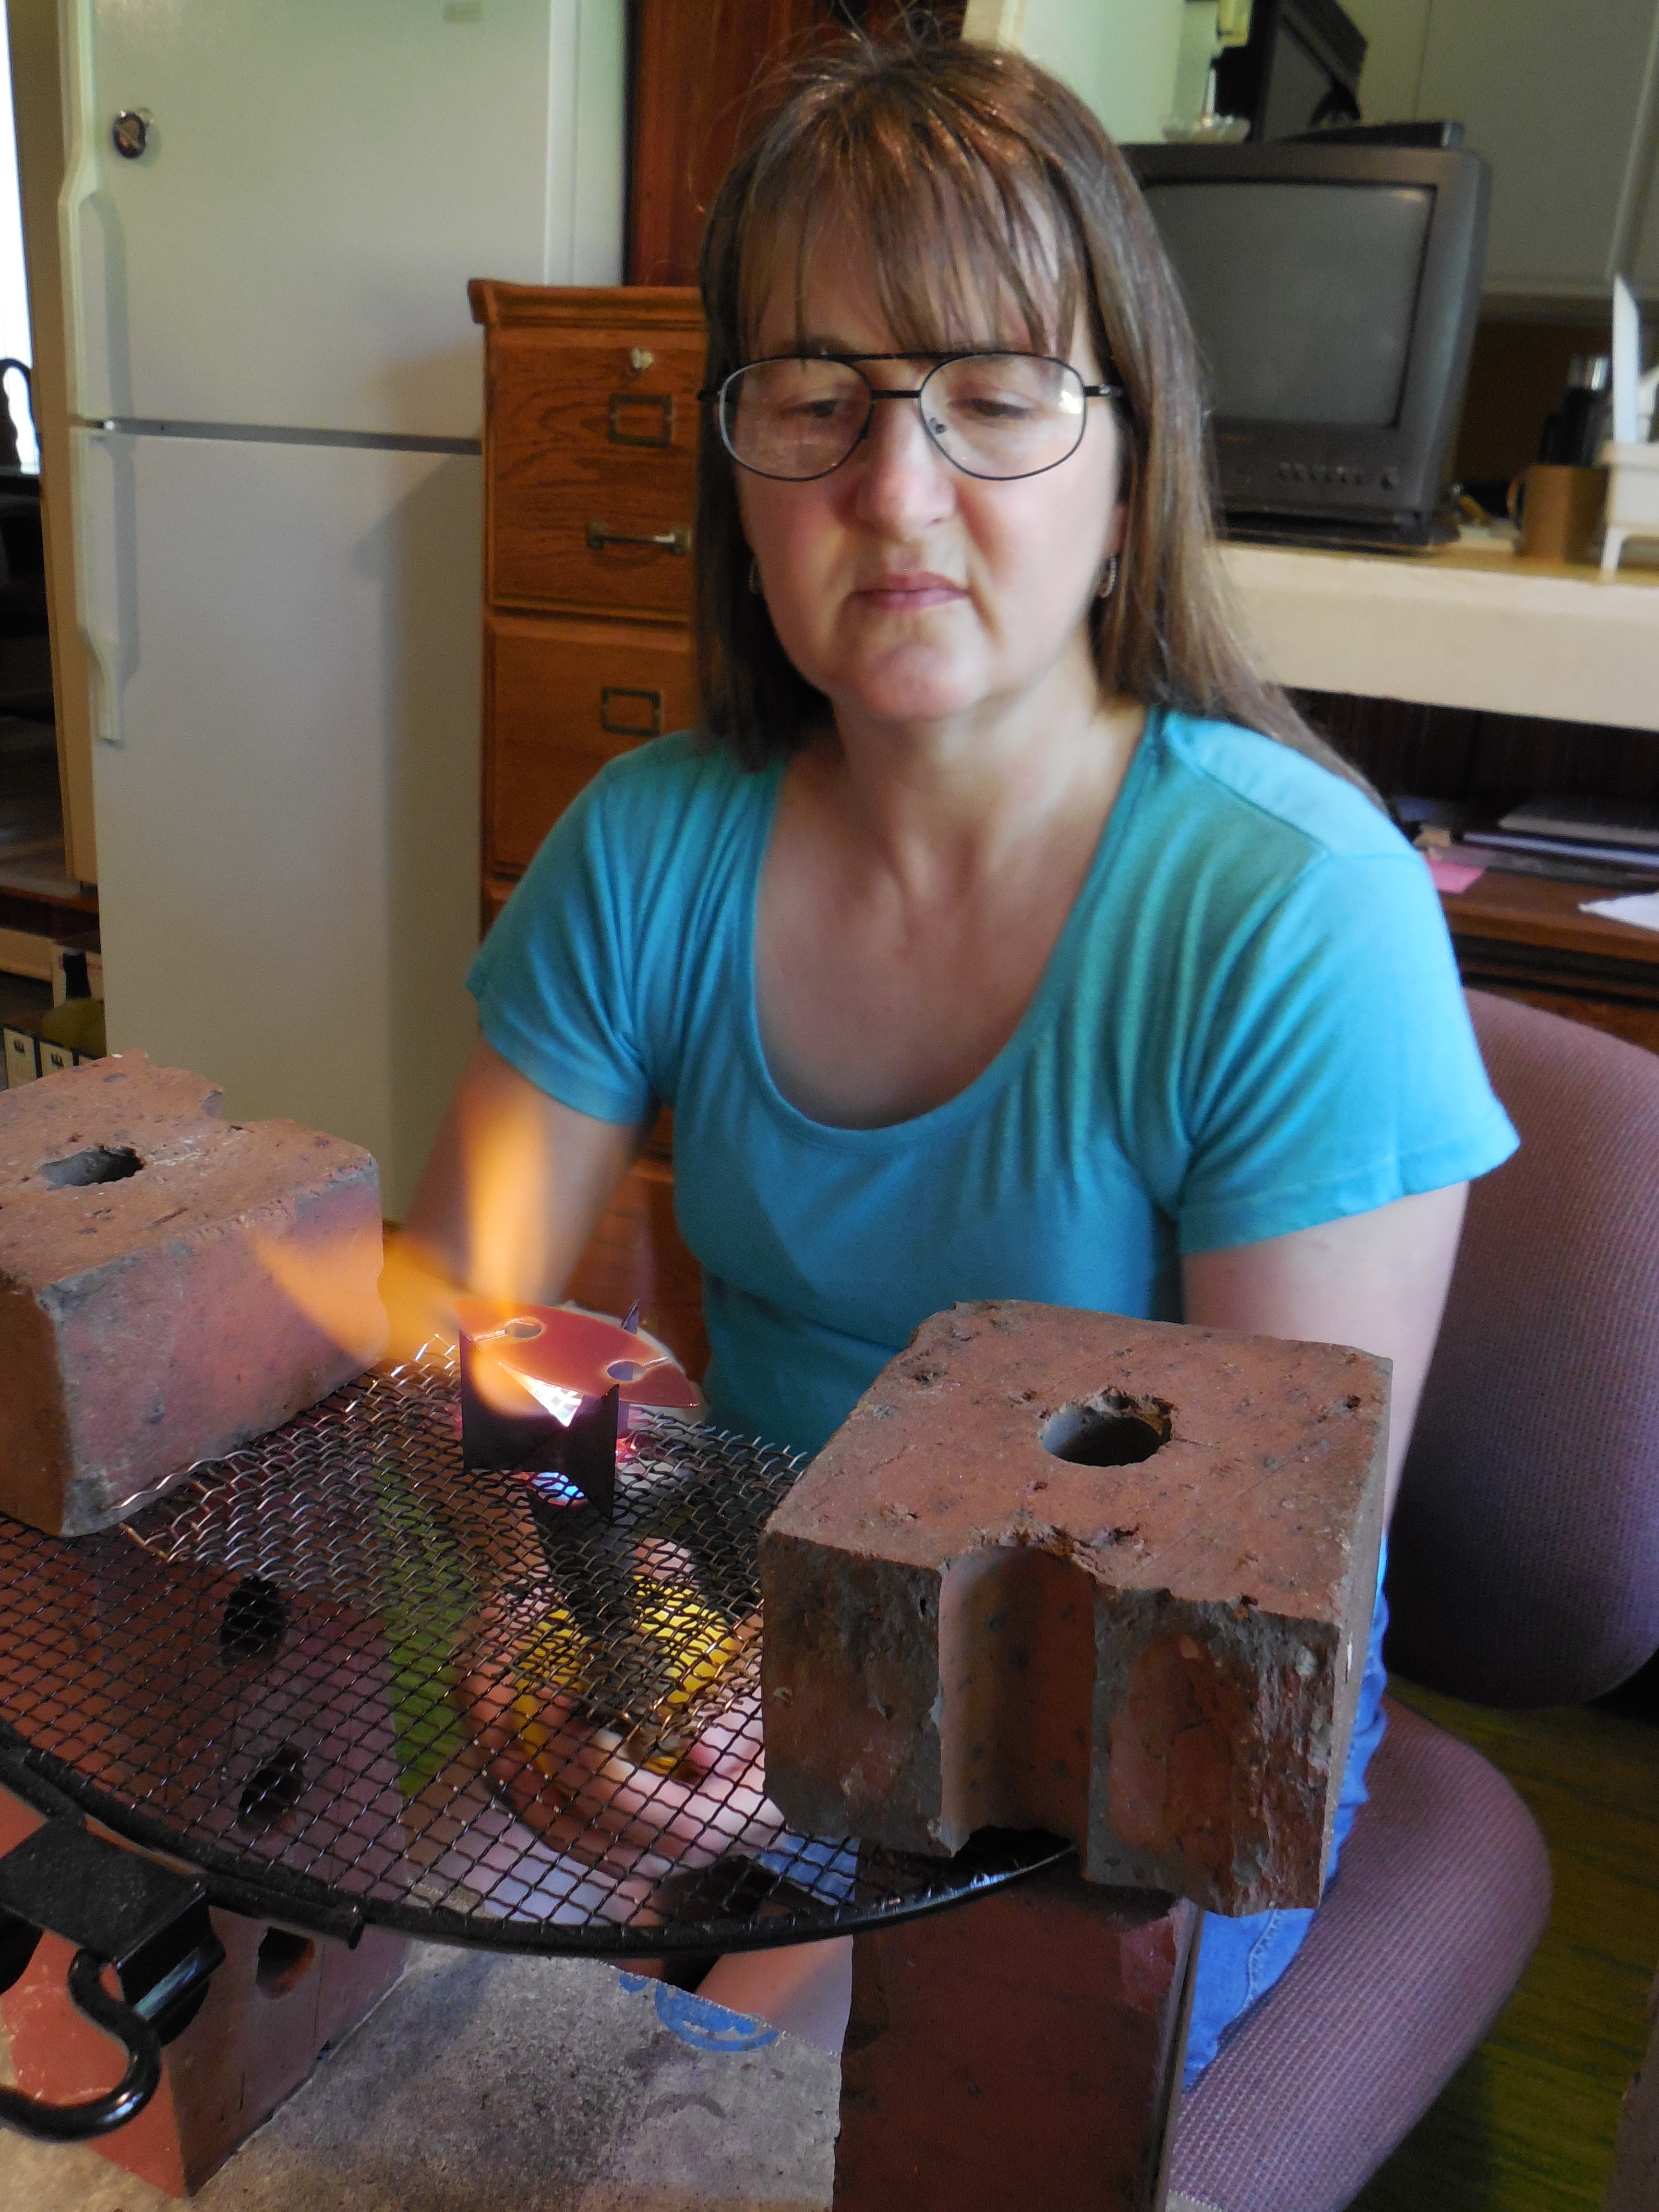
Then I added a photo of myself. Another Etsy store owner/tatter (thanks Marilee Rockley) had critiqued my store and had given me some pointers. She had told me to add a photo of myself. I have been avoiding this task for quite some time….I usually dislike photos of me. I enede up choosing a photo of me torch-firing, working in my enameling studio. Inserting a photo of myself wasn’t as painful as it could have been after I realized that the photo ends up quite small on the Etsy site. Thus you can’t see as many of my wrinkles/imperfections/lack of makeup/etc. as could be possible.
Then I filled in some information in the ‘Shop Info‘ section of my Etsy Shop under the link titled ‘About‘.
If you go to my Etsy Store ‘Shop Info’/’About’ you will see what I typed in about myself and my journey to get to having an Etsy store. Also in this page you will see at least one photo of my enameling/tatting studio.
What I should have been been doing today instead!!!!!!
I have a deadline of March 6th to get this project done because I am hosting book club. I need a deadline to get things like this done!
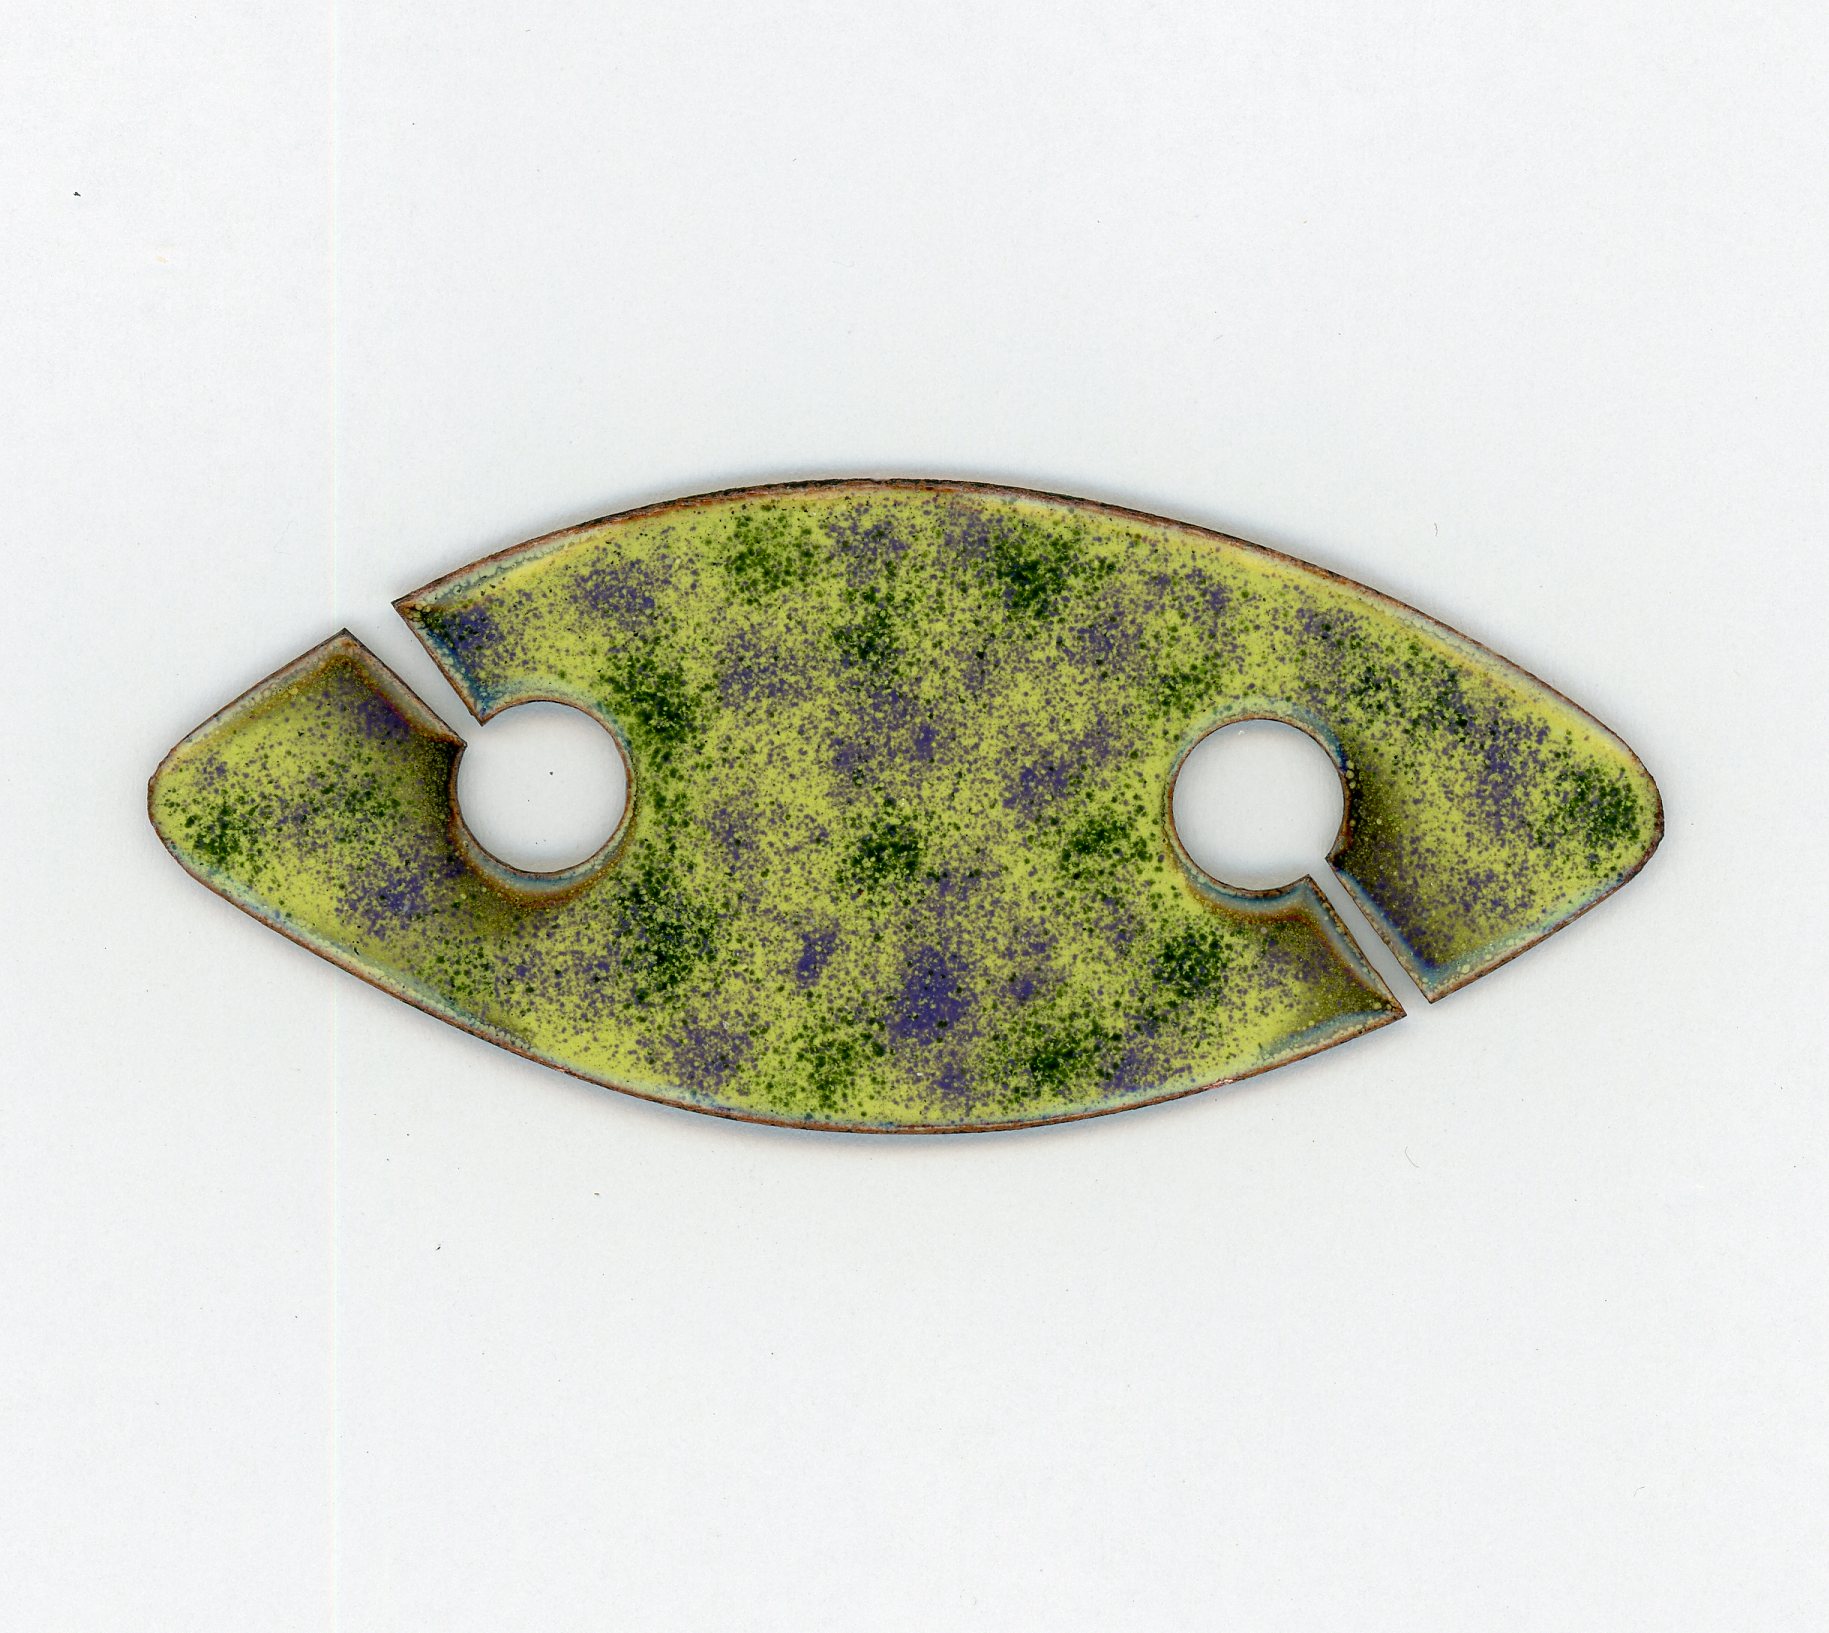
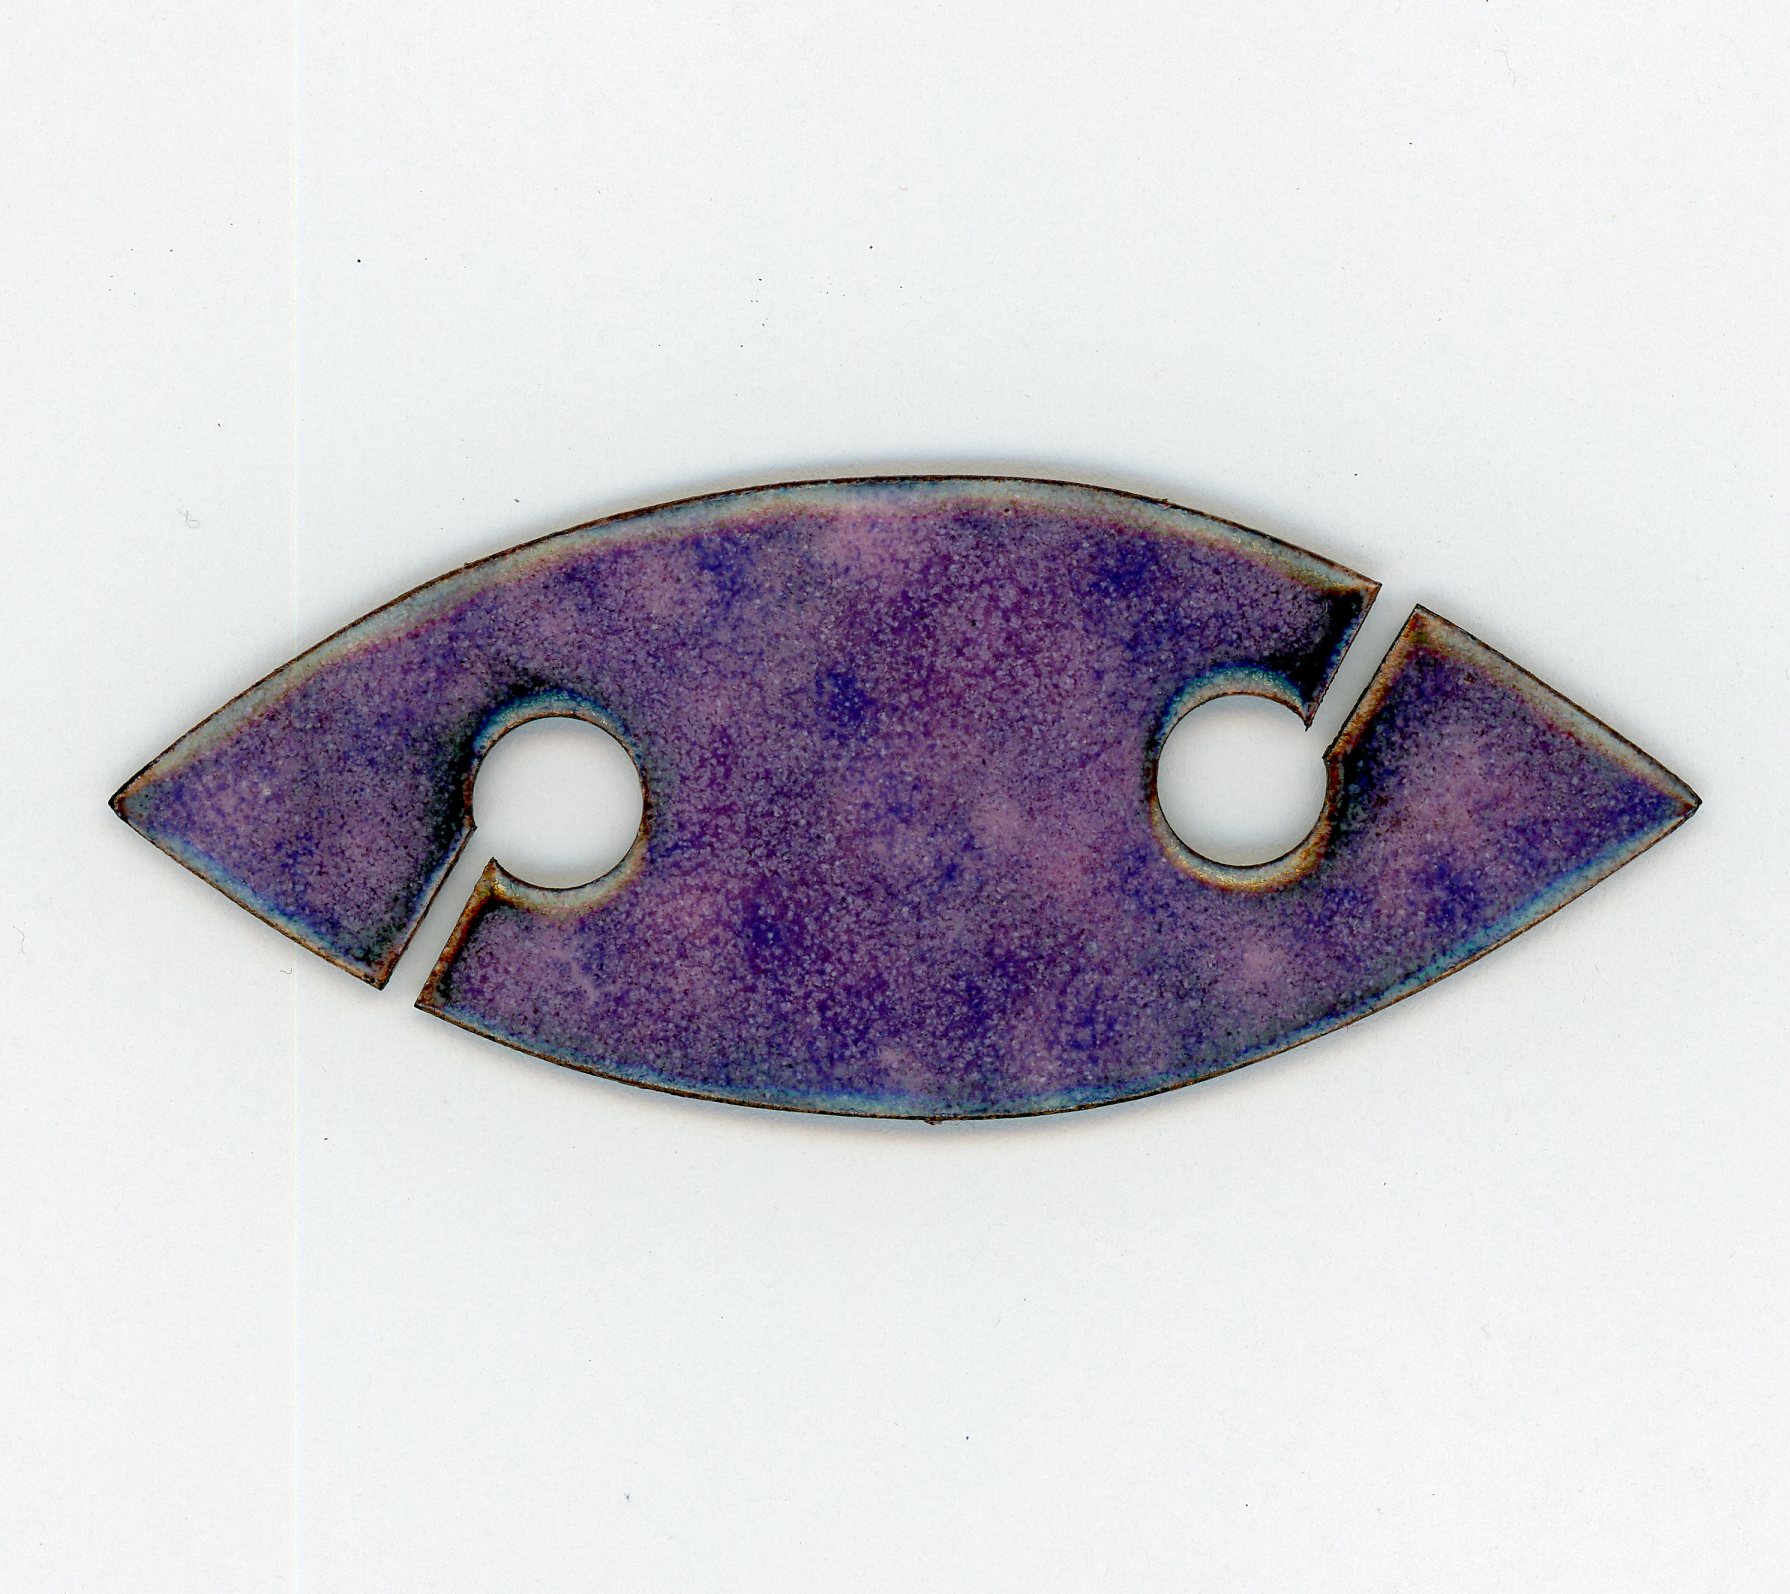
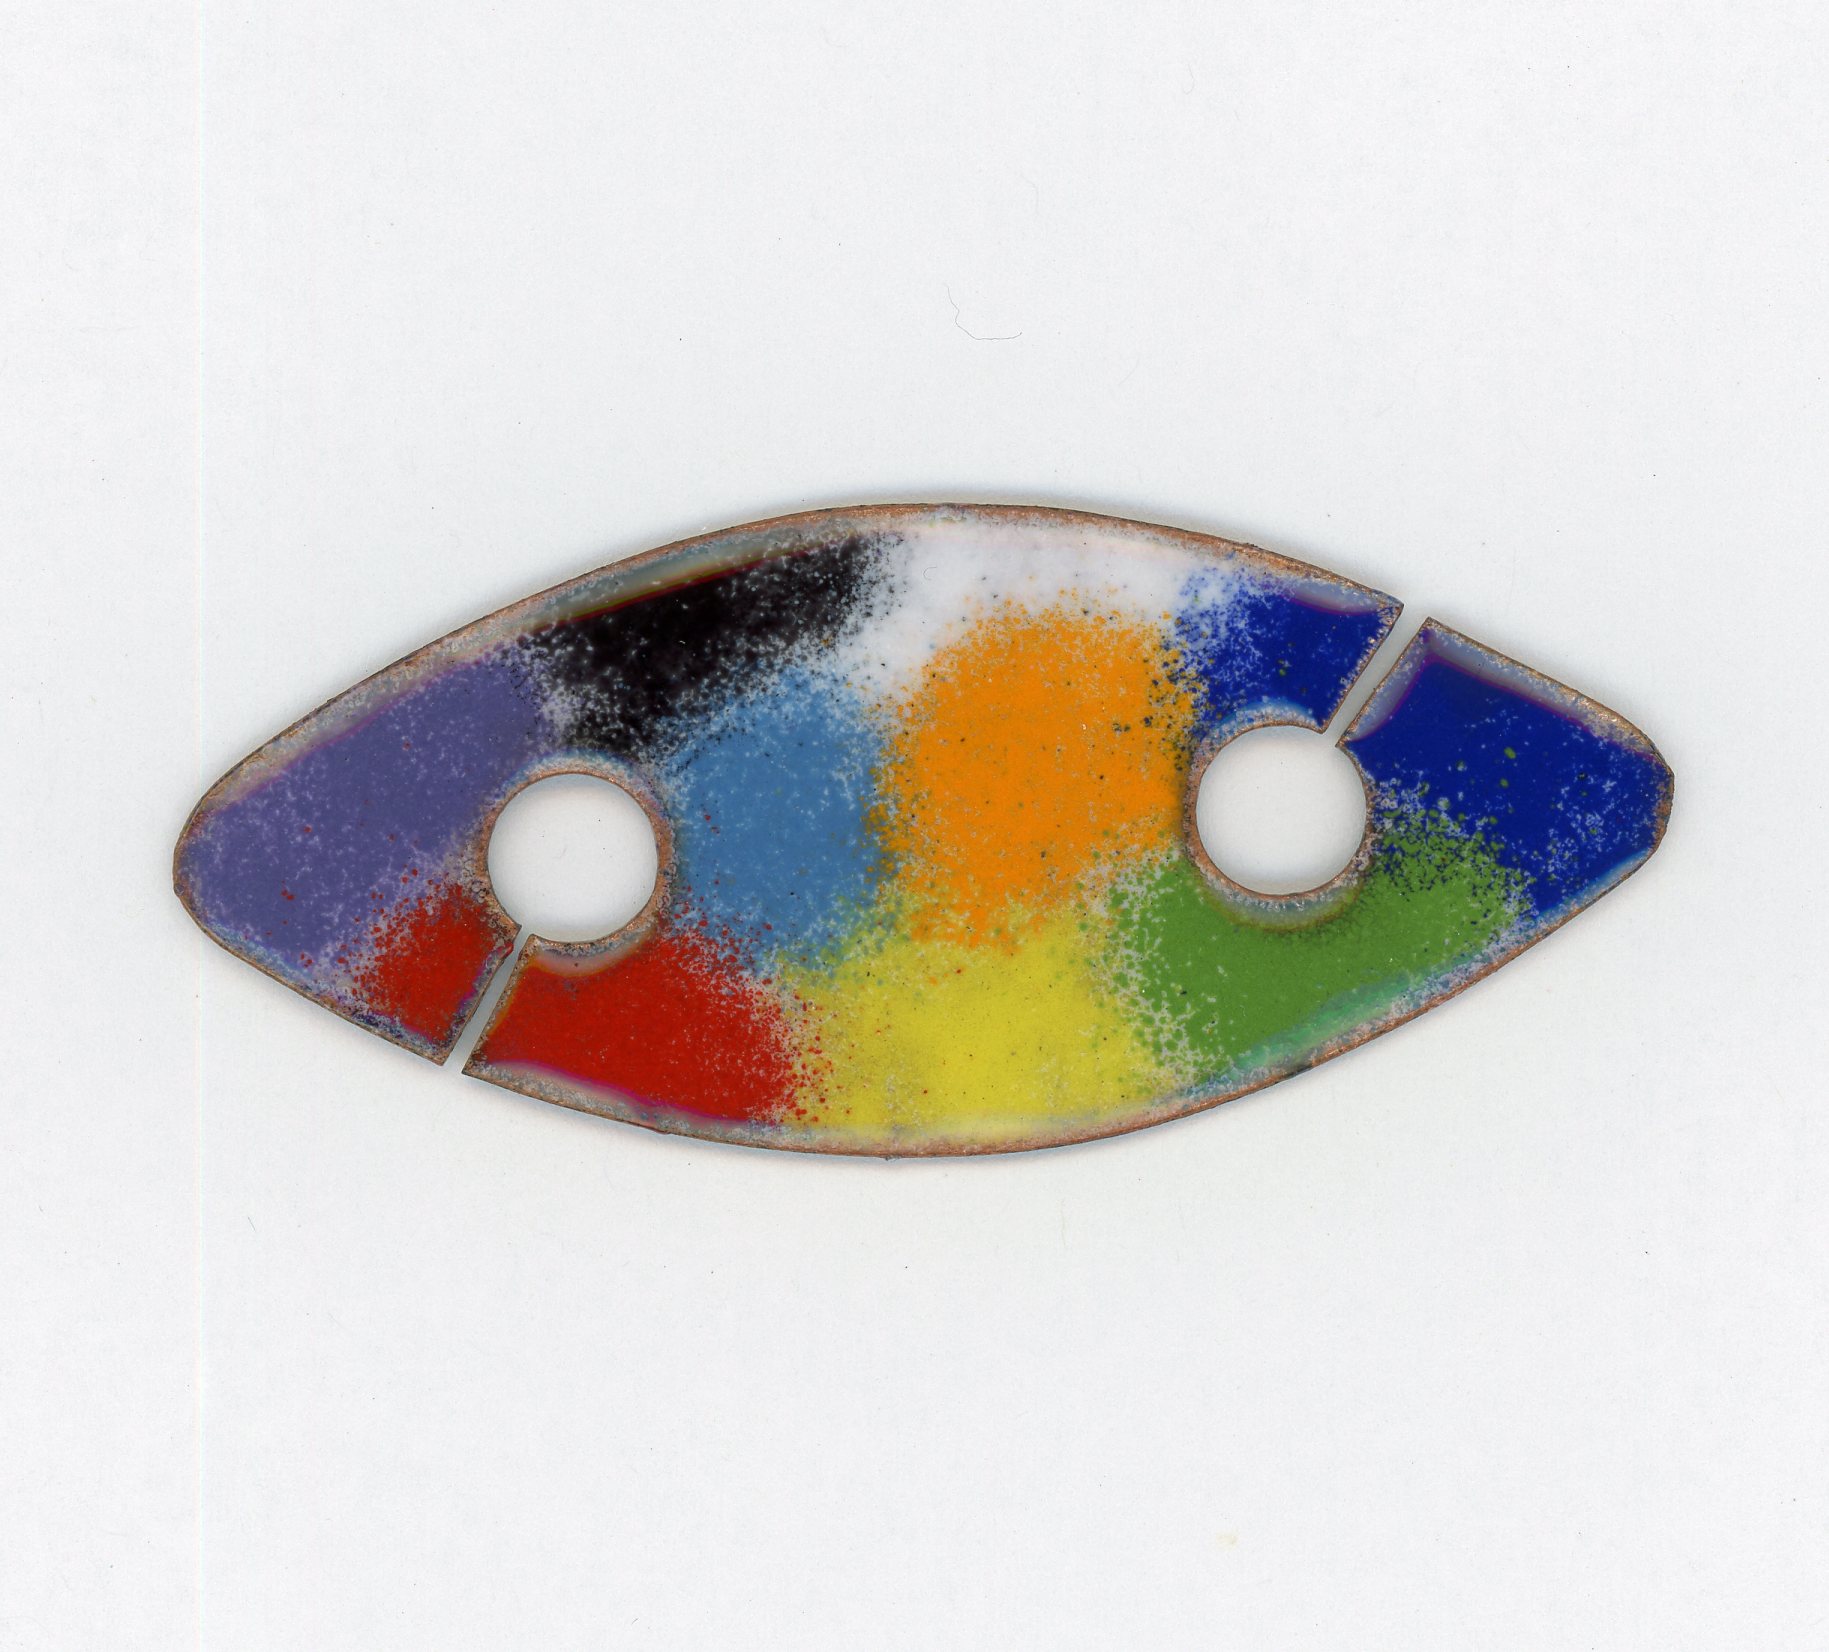
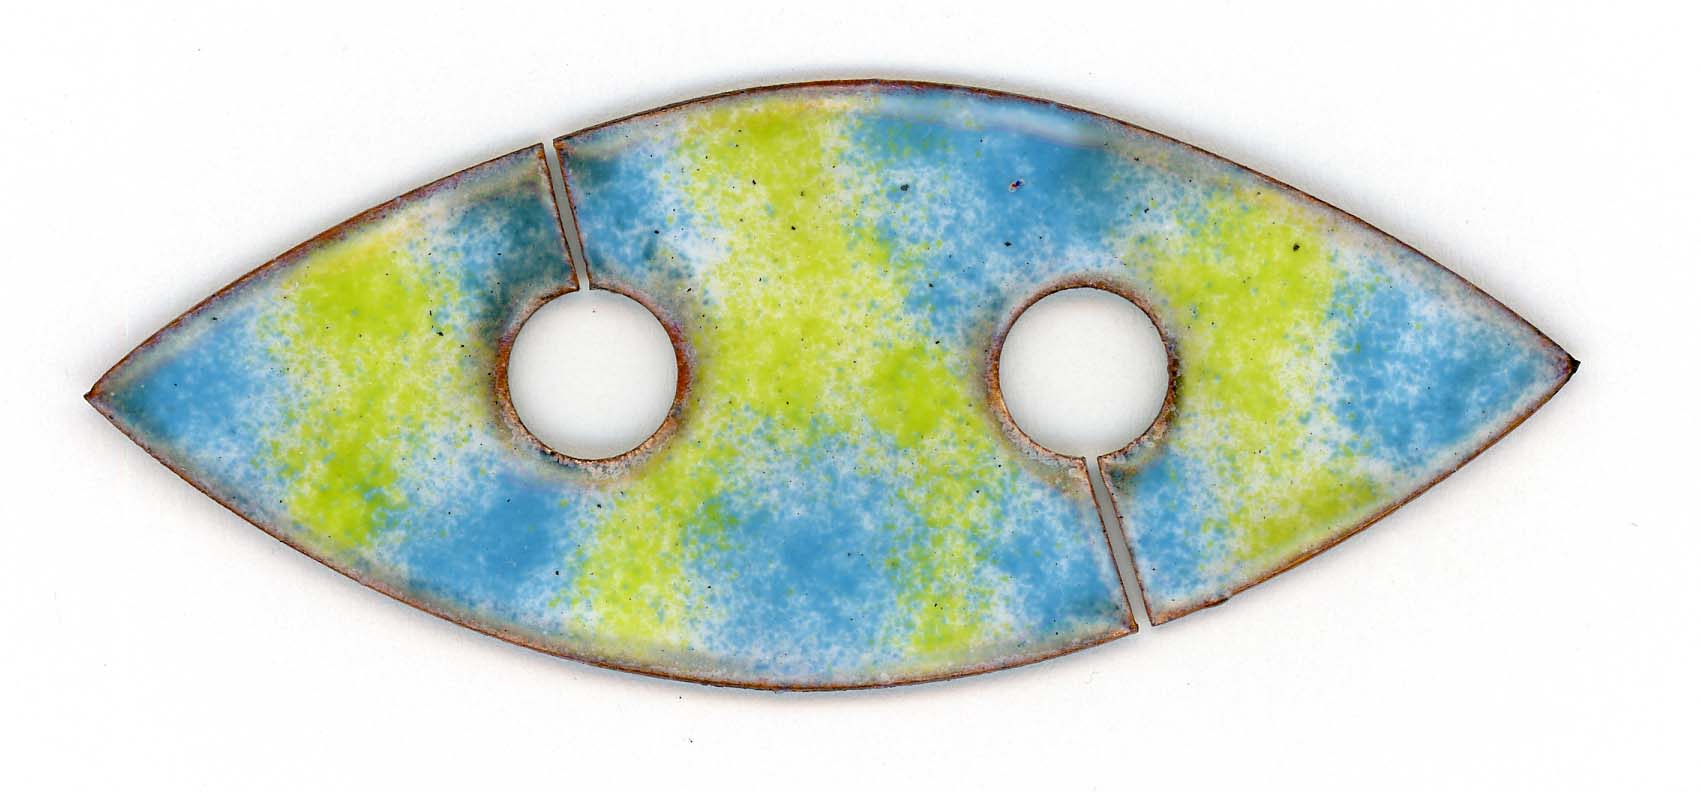
I must have been in a funky mood when I created this shuttle!!! This one-of-a-kind enameled (glass on copper) tatting shuttle features a base of Pine Yellow with Sapphire, & two colors of purple accents. Actually, I’m not so much the ‘funky’ kind of person…I just really like vibrant colors!! Two of my favorites (the yellow and the Sapphire teal) are in this shuttle. See it (buy it) on my Etsy Store: www.Etsy.com/shop/TheShuttleSmith

I knew my The ShuttleSmith Glass/Enamel Copper Tatting Shuttles were unique….I just didn’t realize HOW unique until I just recently did a Google search for ‘enamel tatting shuttles’ and ‘glass tatting shuttles’. I was surprised by what I found (or should I say what I did NOT find!).
In my Google search, it was no surprise to me that Heidi Nakayama’s name, photos, and website came up….she is the ‘Queen of Tatting Shuttles’. Heidi wrote the book on tatting shuttles, literally and physically: Tatting Shuttles of American Collectors is a must-have book any tatter interested in the beautiful tools that have been a part of tatting’s history. Check out her website at: Tatting Shuttles of American Collectors Website . It is full of eye-candy and great articles on contemporary tatters and shuttle collectors. Heidi has Dora Young’s shuttle & tatting collection as well as rights to Dora’s very unique book, which she is planning to republish.
A chapter about my The ShuttleSmith Sterling Silver Tatting Shuttles (I used to make) is included in Heidi’s book. I had the good fortune to meet Heidi at the 1998 IOLI Convention in San Diego, California. It was at this time she was still actively researching and writing her book and had taken photos of my handmade sterling silver shuttles. It was there that Heidi asked me if I had ever considered enameling my silver shuttles. At that point in time, the answer was ‘No’–I had a full-time job, two small children, an active family lifestyle, and active ‘in my spare time’ teaching needlework and lacemaking techniques, teaching weekend motorcycle safety classes and creating silver tatting shuttles….there simply was no time for another hobby!
Now flash-forward to a year or so ago—I stumbled into a class on enameling and was hooked! Of course, my first thought was applying the artform to tatting shuttles (everything is TATTING related!). I don’t want to know how much money I dumped into this new artform….but I have had alot of fun in the process. And just now after doing a search on enamel/glass tatting shuttles I have realized how very unique my shuttles are.
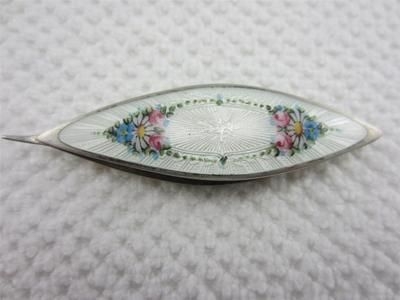
What I did find on the internet was a couple of photos of old/historical enameled shuttles. Most have a thin layer of glass/enamel over silver. Many times, the underlying silver is patterned. This is an enameling technique/style called ‘quilloche’ or ‘basse taille’. I have seen a few enameled shuttles in other peoples collections but have never found one myself in antique stores. I believe old enameled shuttles to be fairly rare. Now that I am an ‘enamelist’ I know that enameling does not work well with ‘sterling silver’. The base needs to be ‘fine/pure silver’. The impurities (the 7.5% of non-silver metal) in ‘sterling silver’ will not allow the glass particles of enameling to fuse to the metal base.

Beyond the historical enamel shuttles, probably from the early part of the 20th century, I could not find any reference to Enamel Tatting Shuttles until I created mine. Now if you Google search ‘Enamel Tatting Shuttle’, my The ShuttleSmith Glass/Enamel Copper Tatting Shuttles come up in big numbers. I use copper as the base metal for my tatting shuttles–A. it’s alot cheaper to buy, B. it’s easier to use, & C. why use a precious/expensive metal when you are going to cover it up with something like glass?
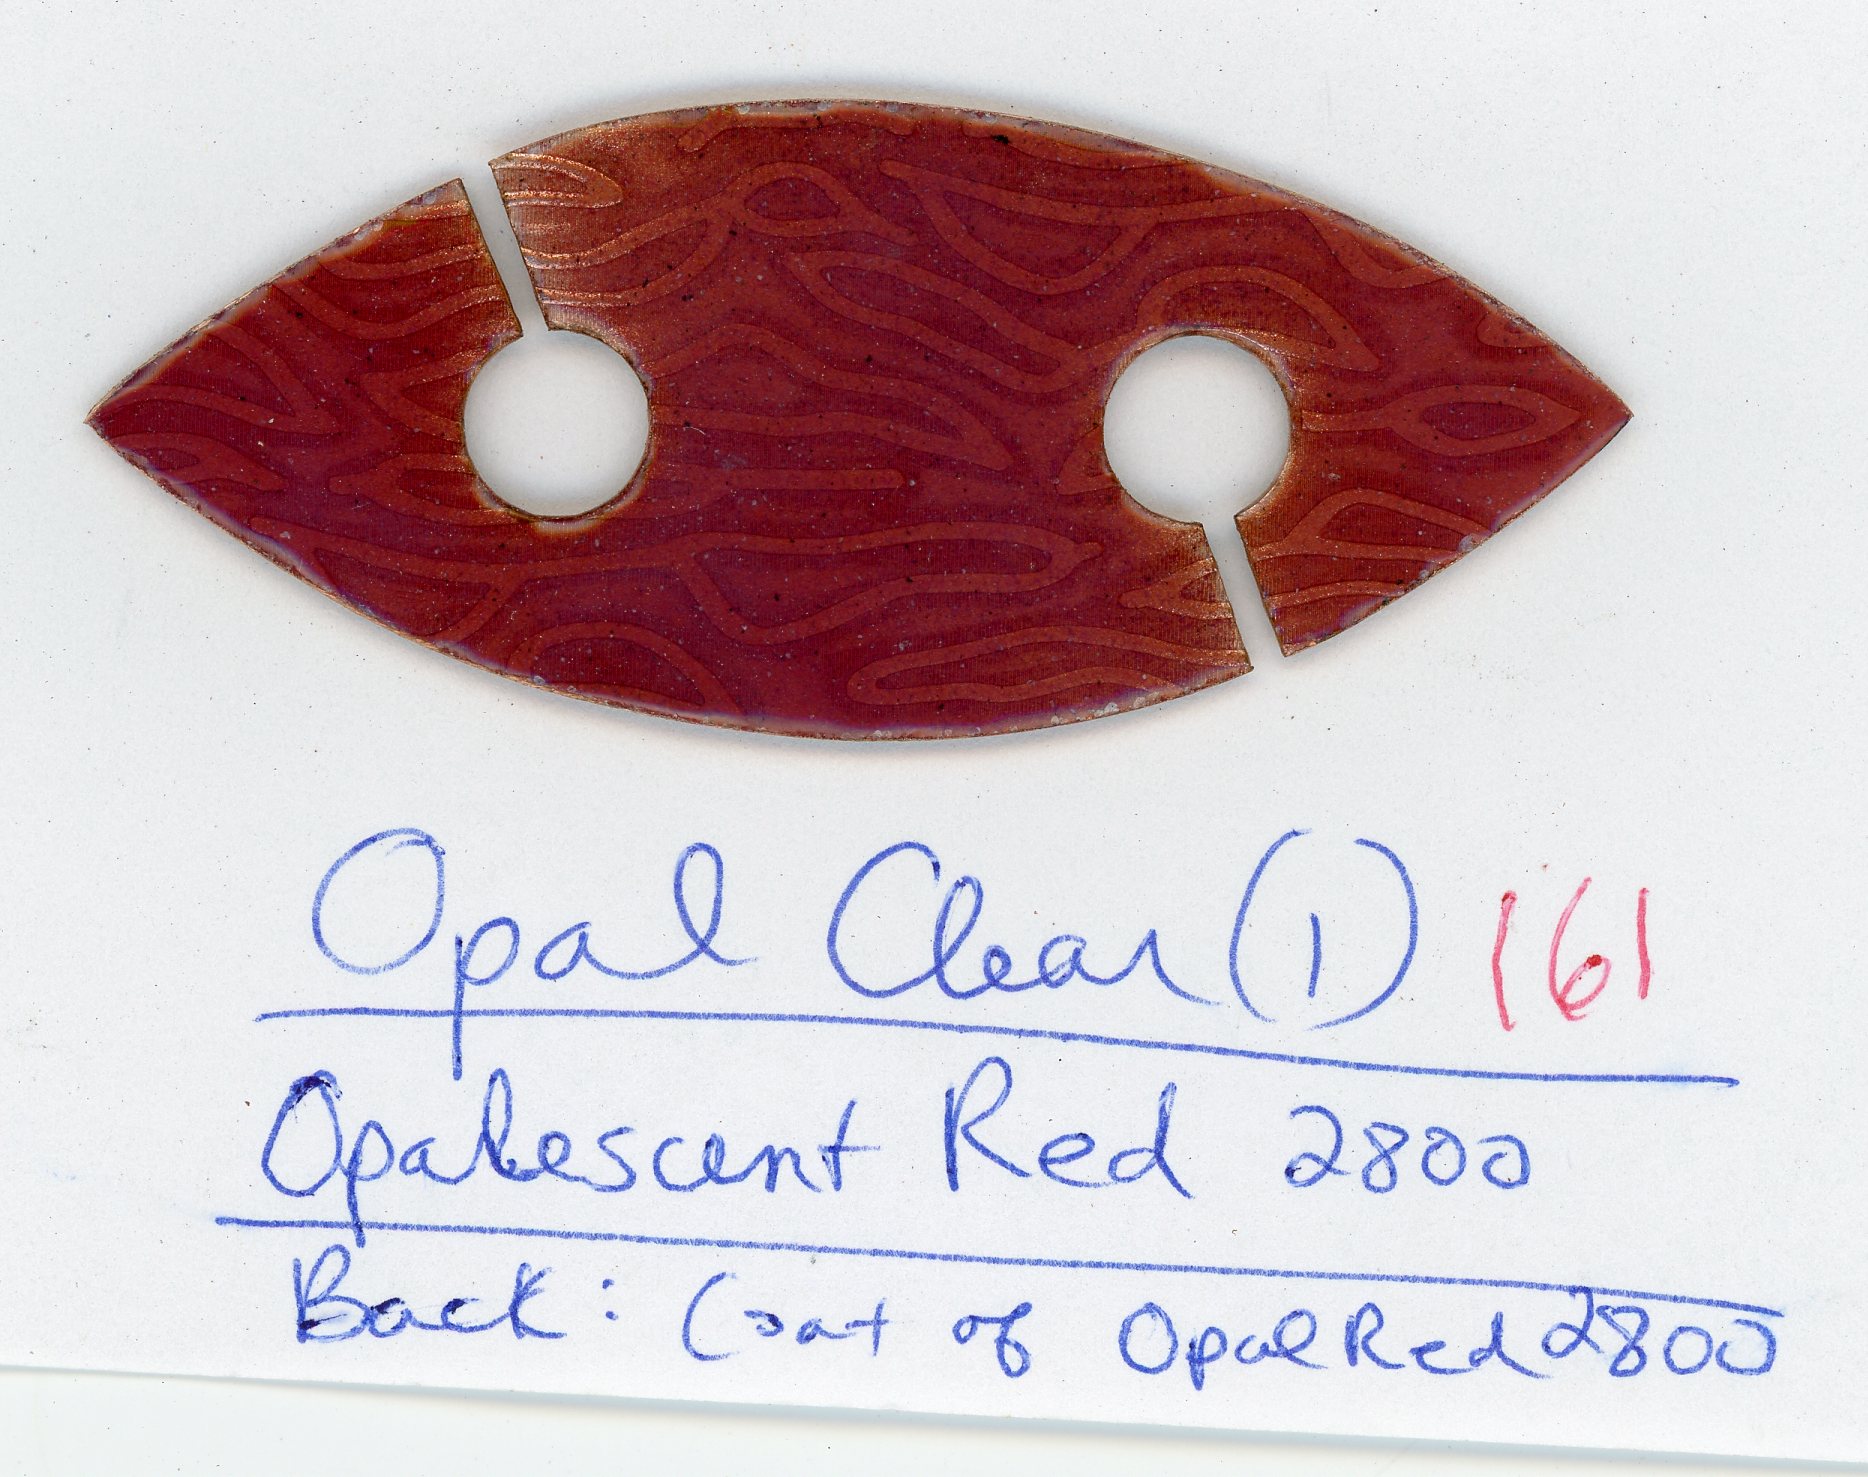
ShuttleSmith Glass/Enamel Copper Tatting Shuttles are a layer of copper metal upon which glass particles are fused/melted to the base metal using high heat (ca 1300C) from a hand-held torch. Both sides are coated in glass, though the backside is quite plain due to enameling process limitations. The result is a flat, hoare-style tatting shuttle that IS glass. It ‘tinks’/sounds like glass. And it can/will break like anything glass if it is dropped (usually from a distance to a hard surface such as concrete).
Check out ShuttleSmith Glass/Enamel Copper Tatting Shuttles for sale on Etsy: The ShuttleSmith Etsy Store
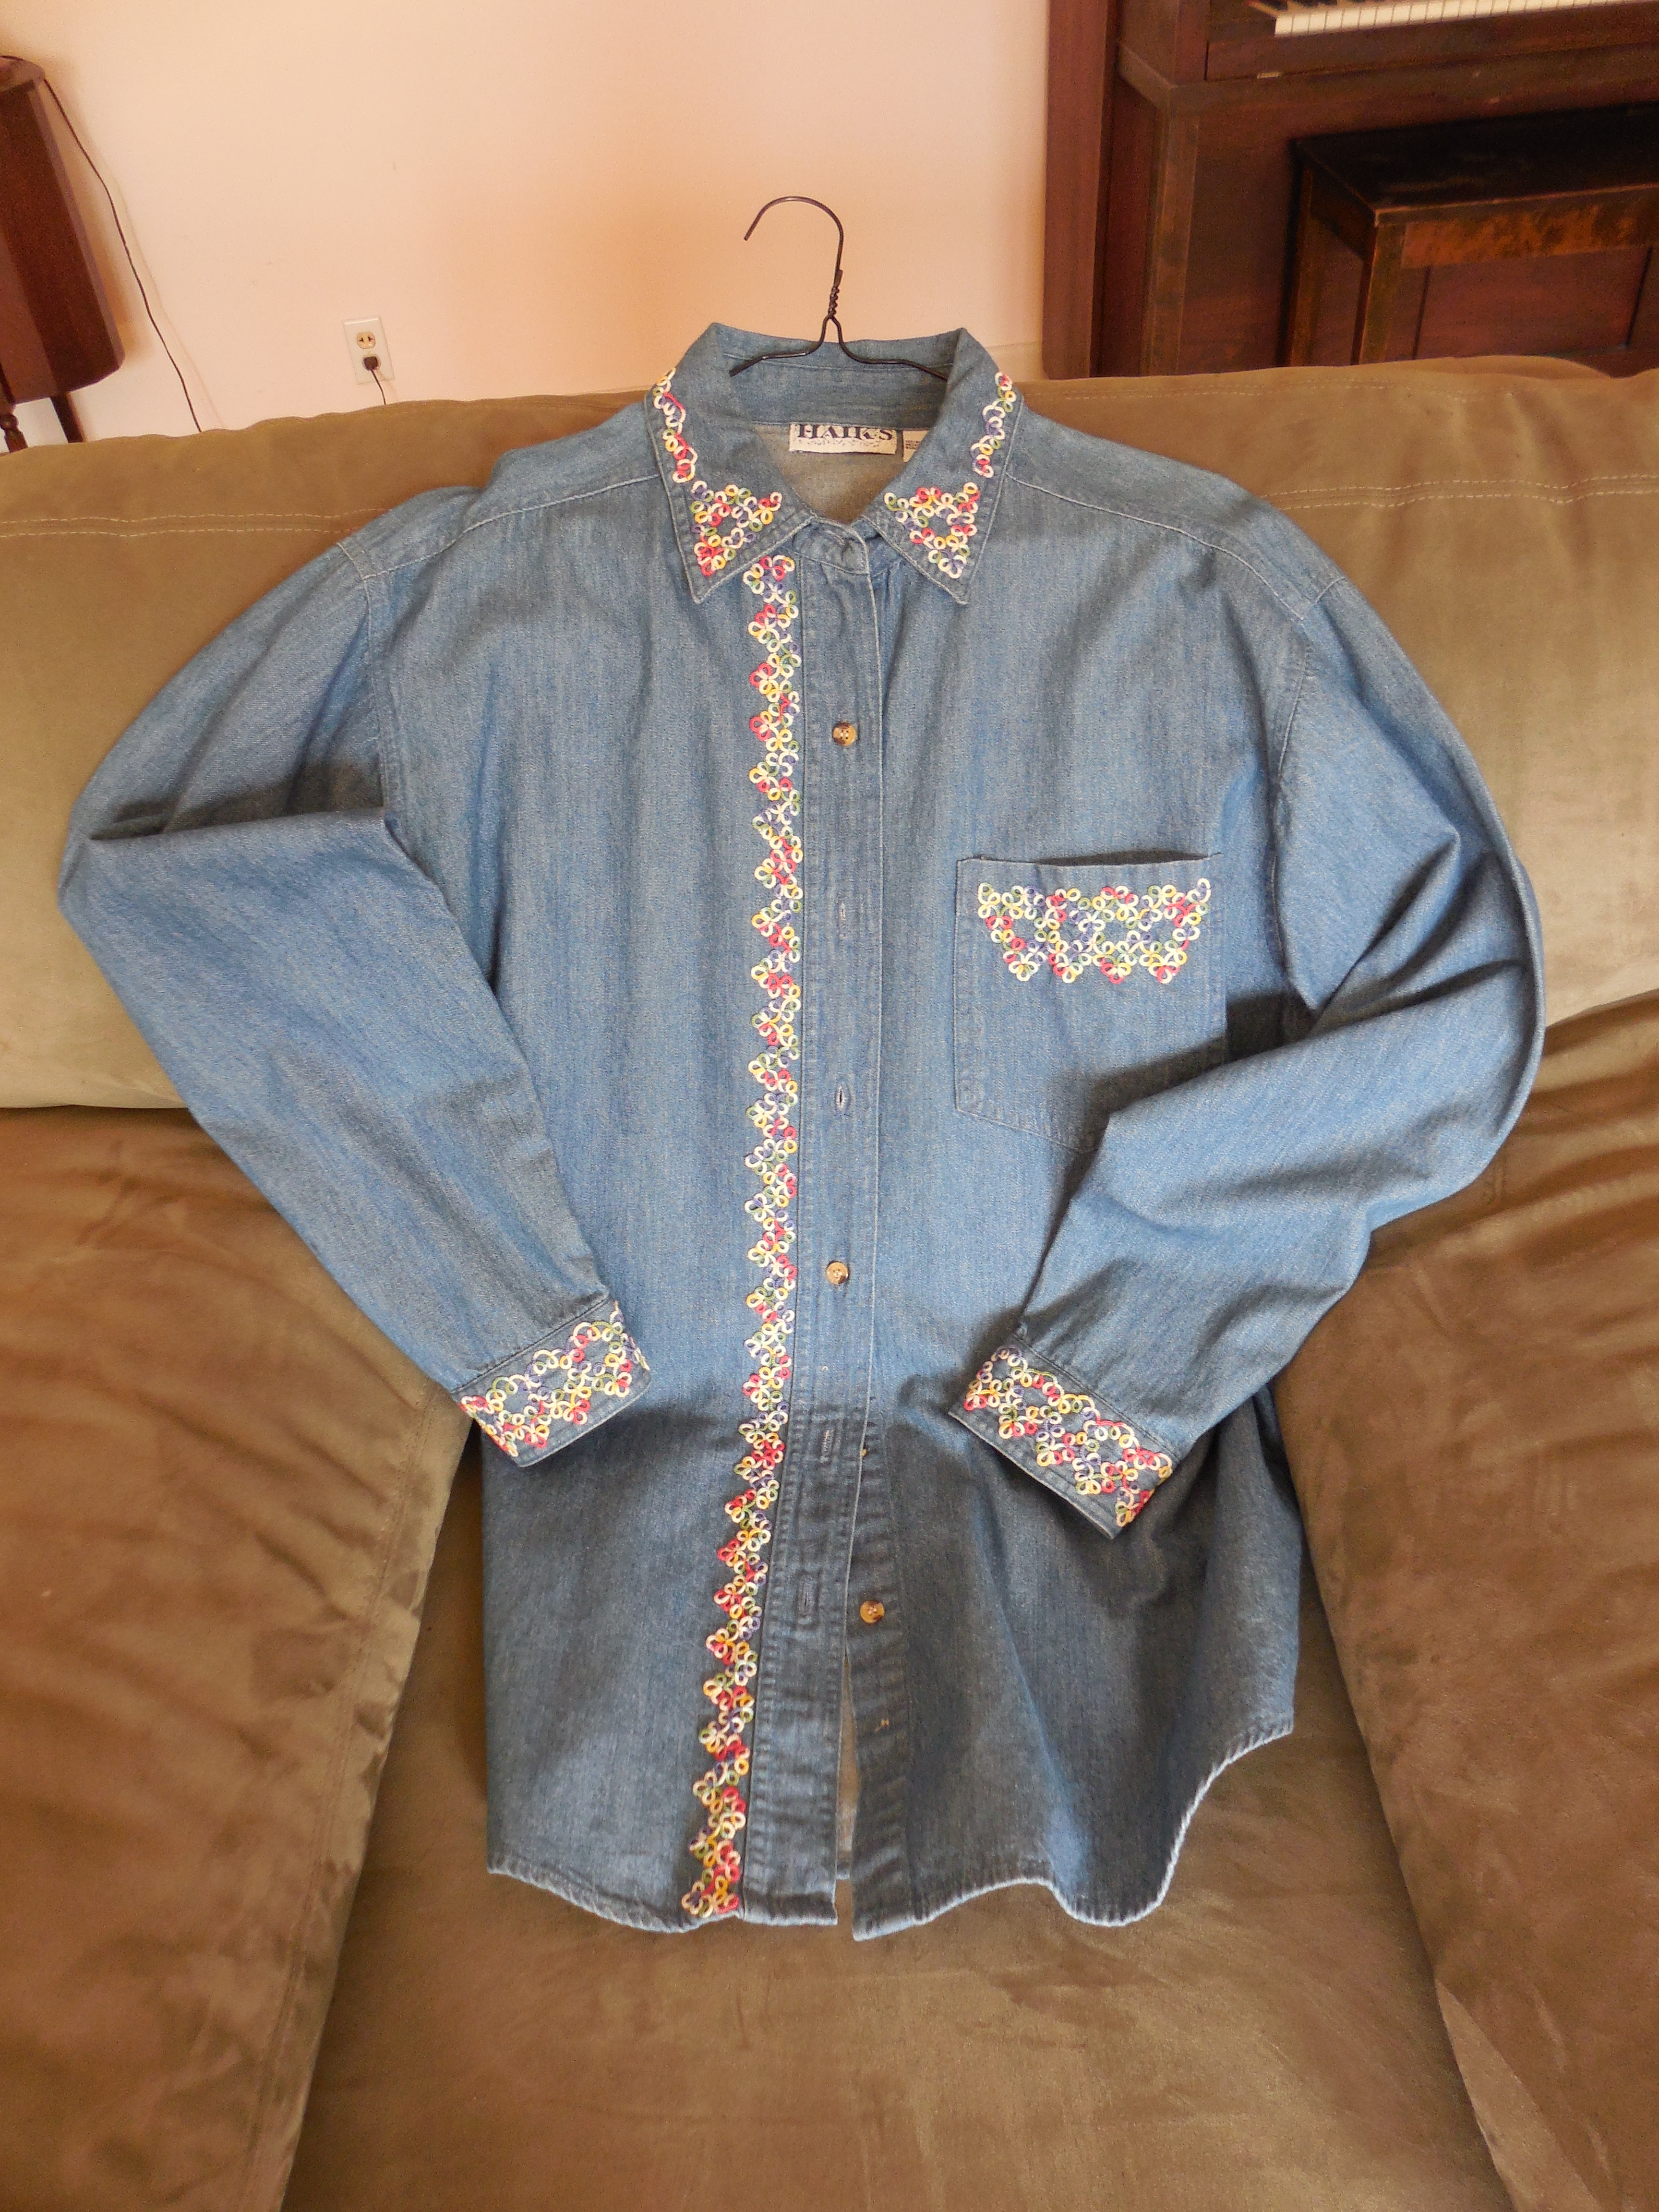

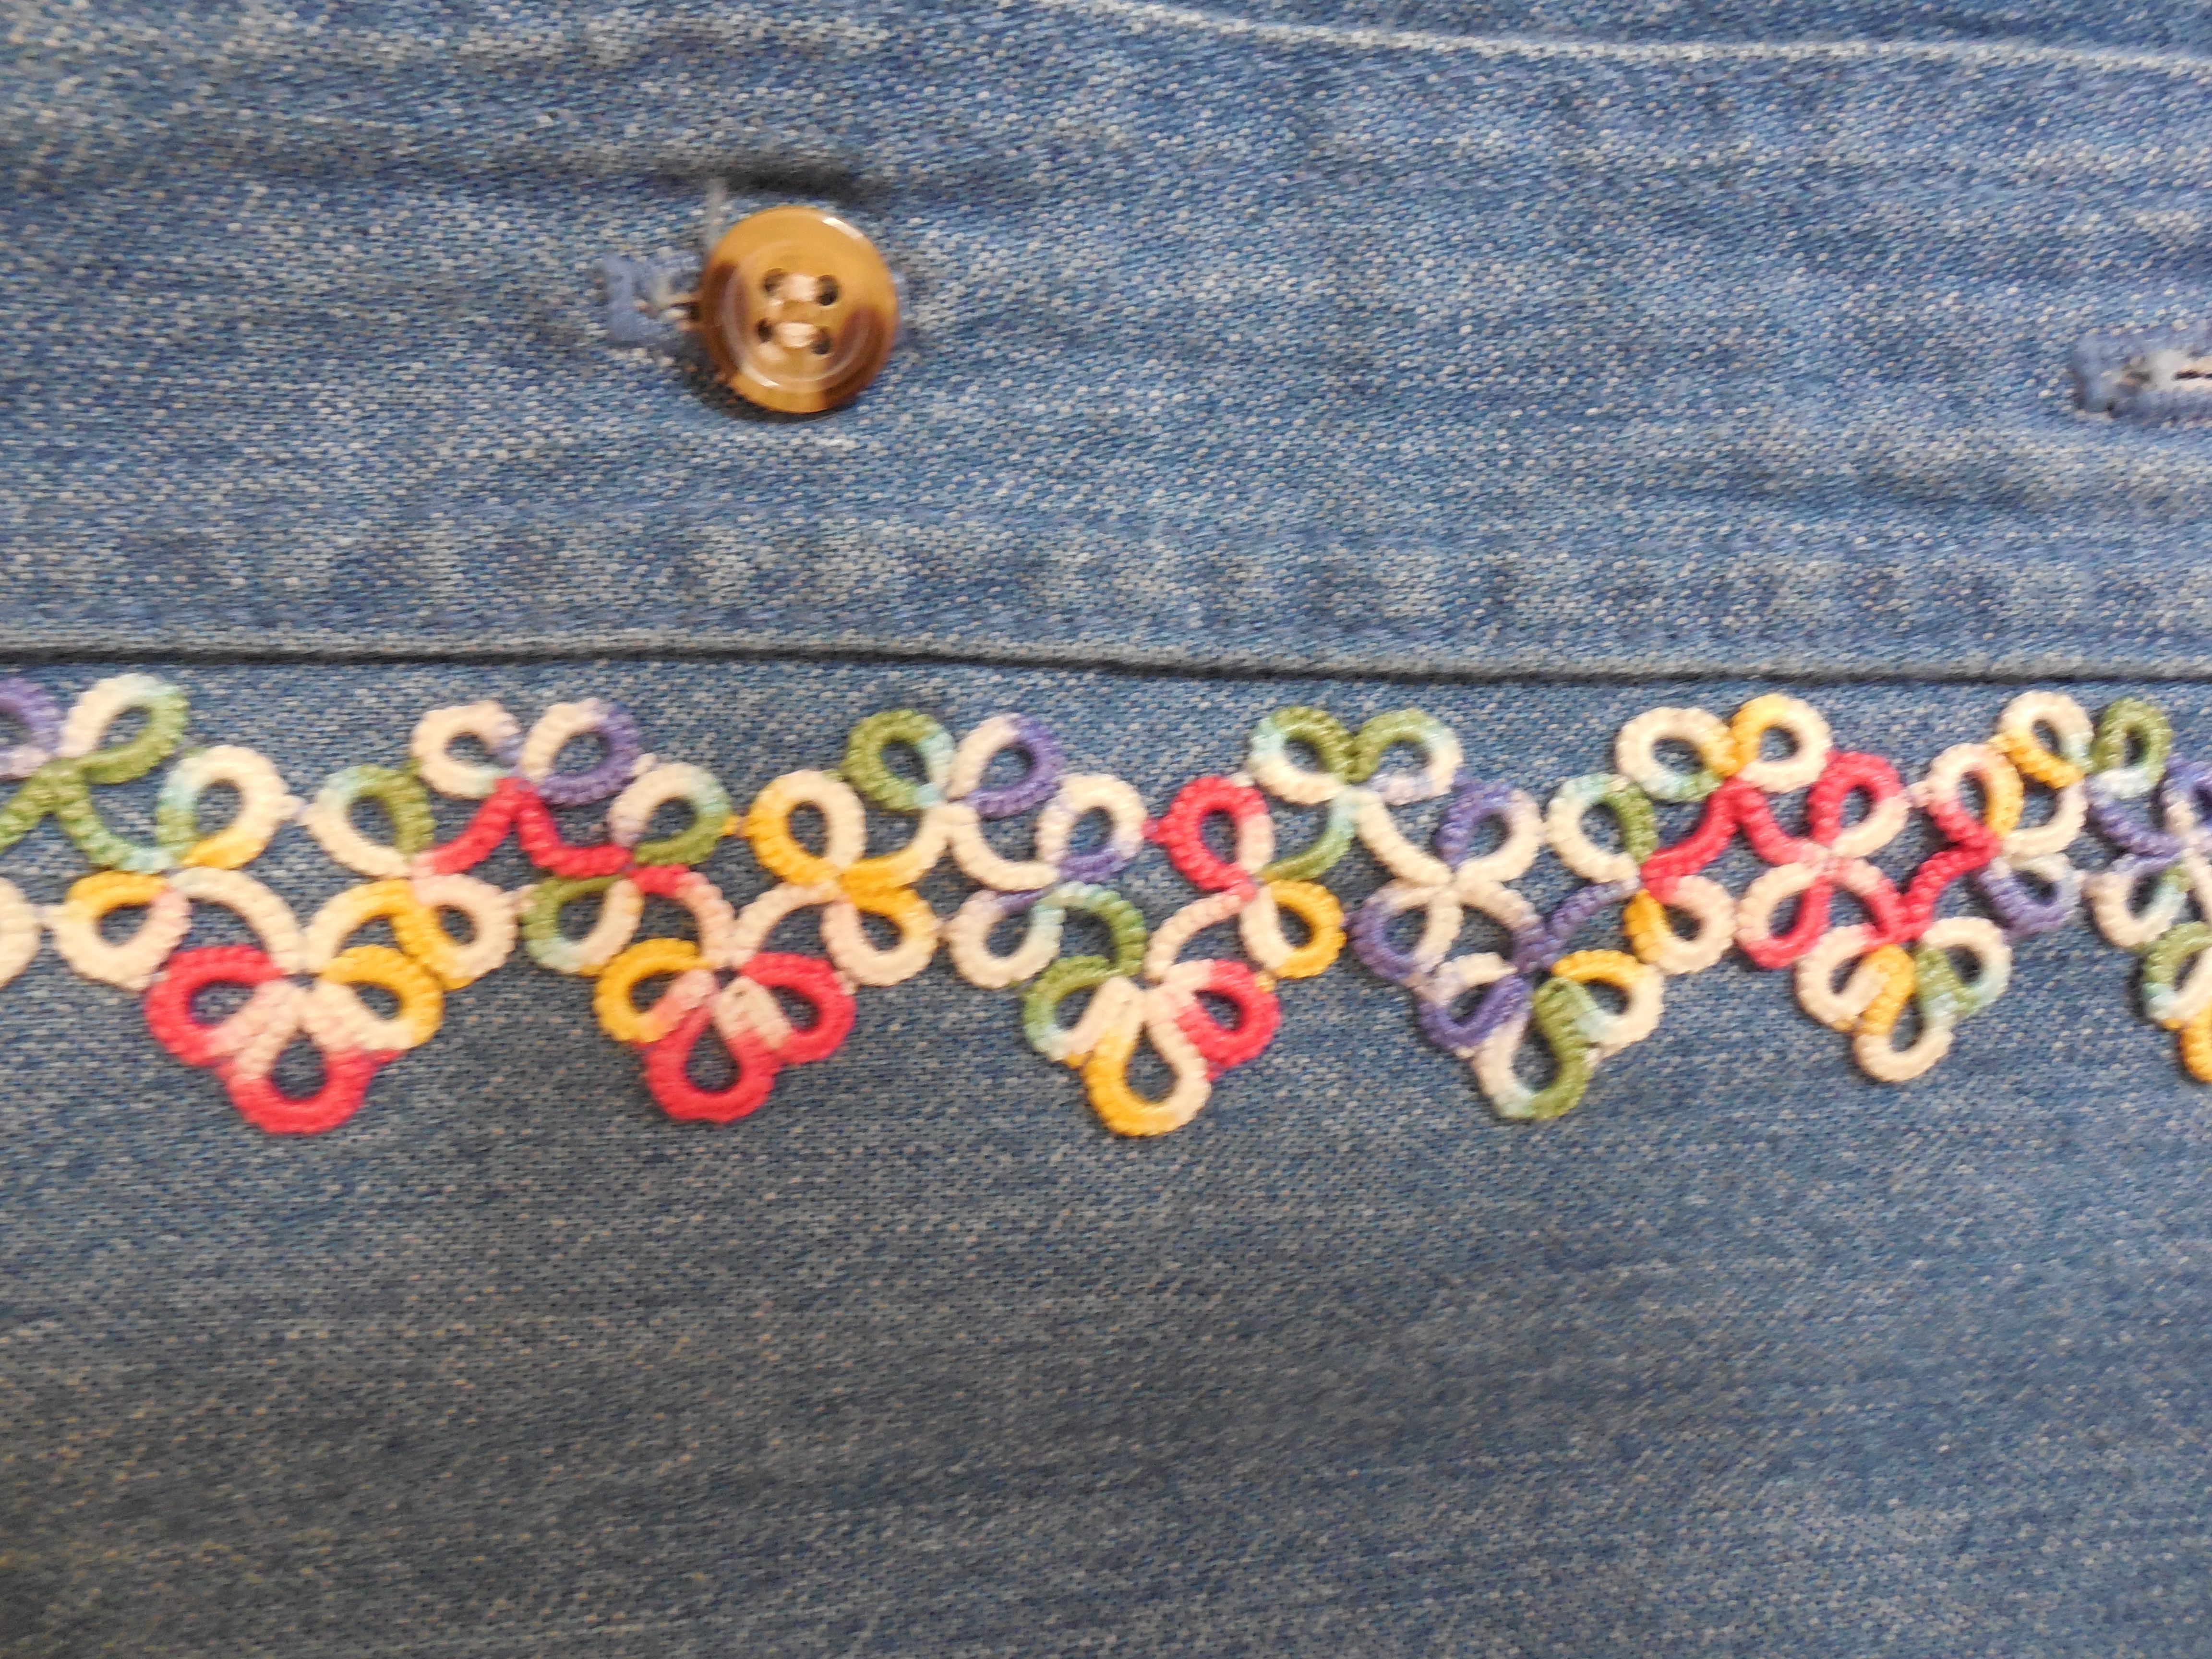
While updating/cleaning up my website recently, I realized that I had only posted two of the variations of patterns that I had done for my ‘Tatting Embellished Denim Shirt’. So, in several postings, I will continue to share my variations of a classic pattern (seen in the bottom photo) that I used to embellish a denim shirt.
Not counting the original pattern (used along the button placket) I created 5 different variations. Look for them in upcoming blog posts!