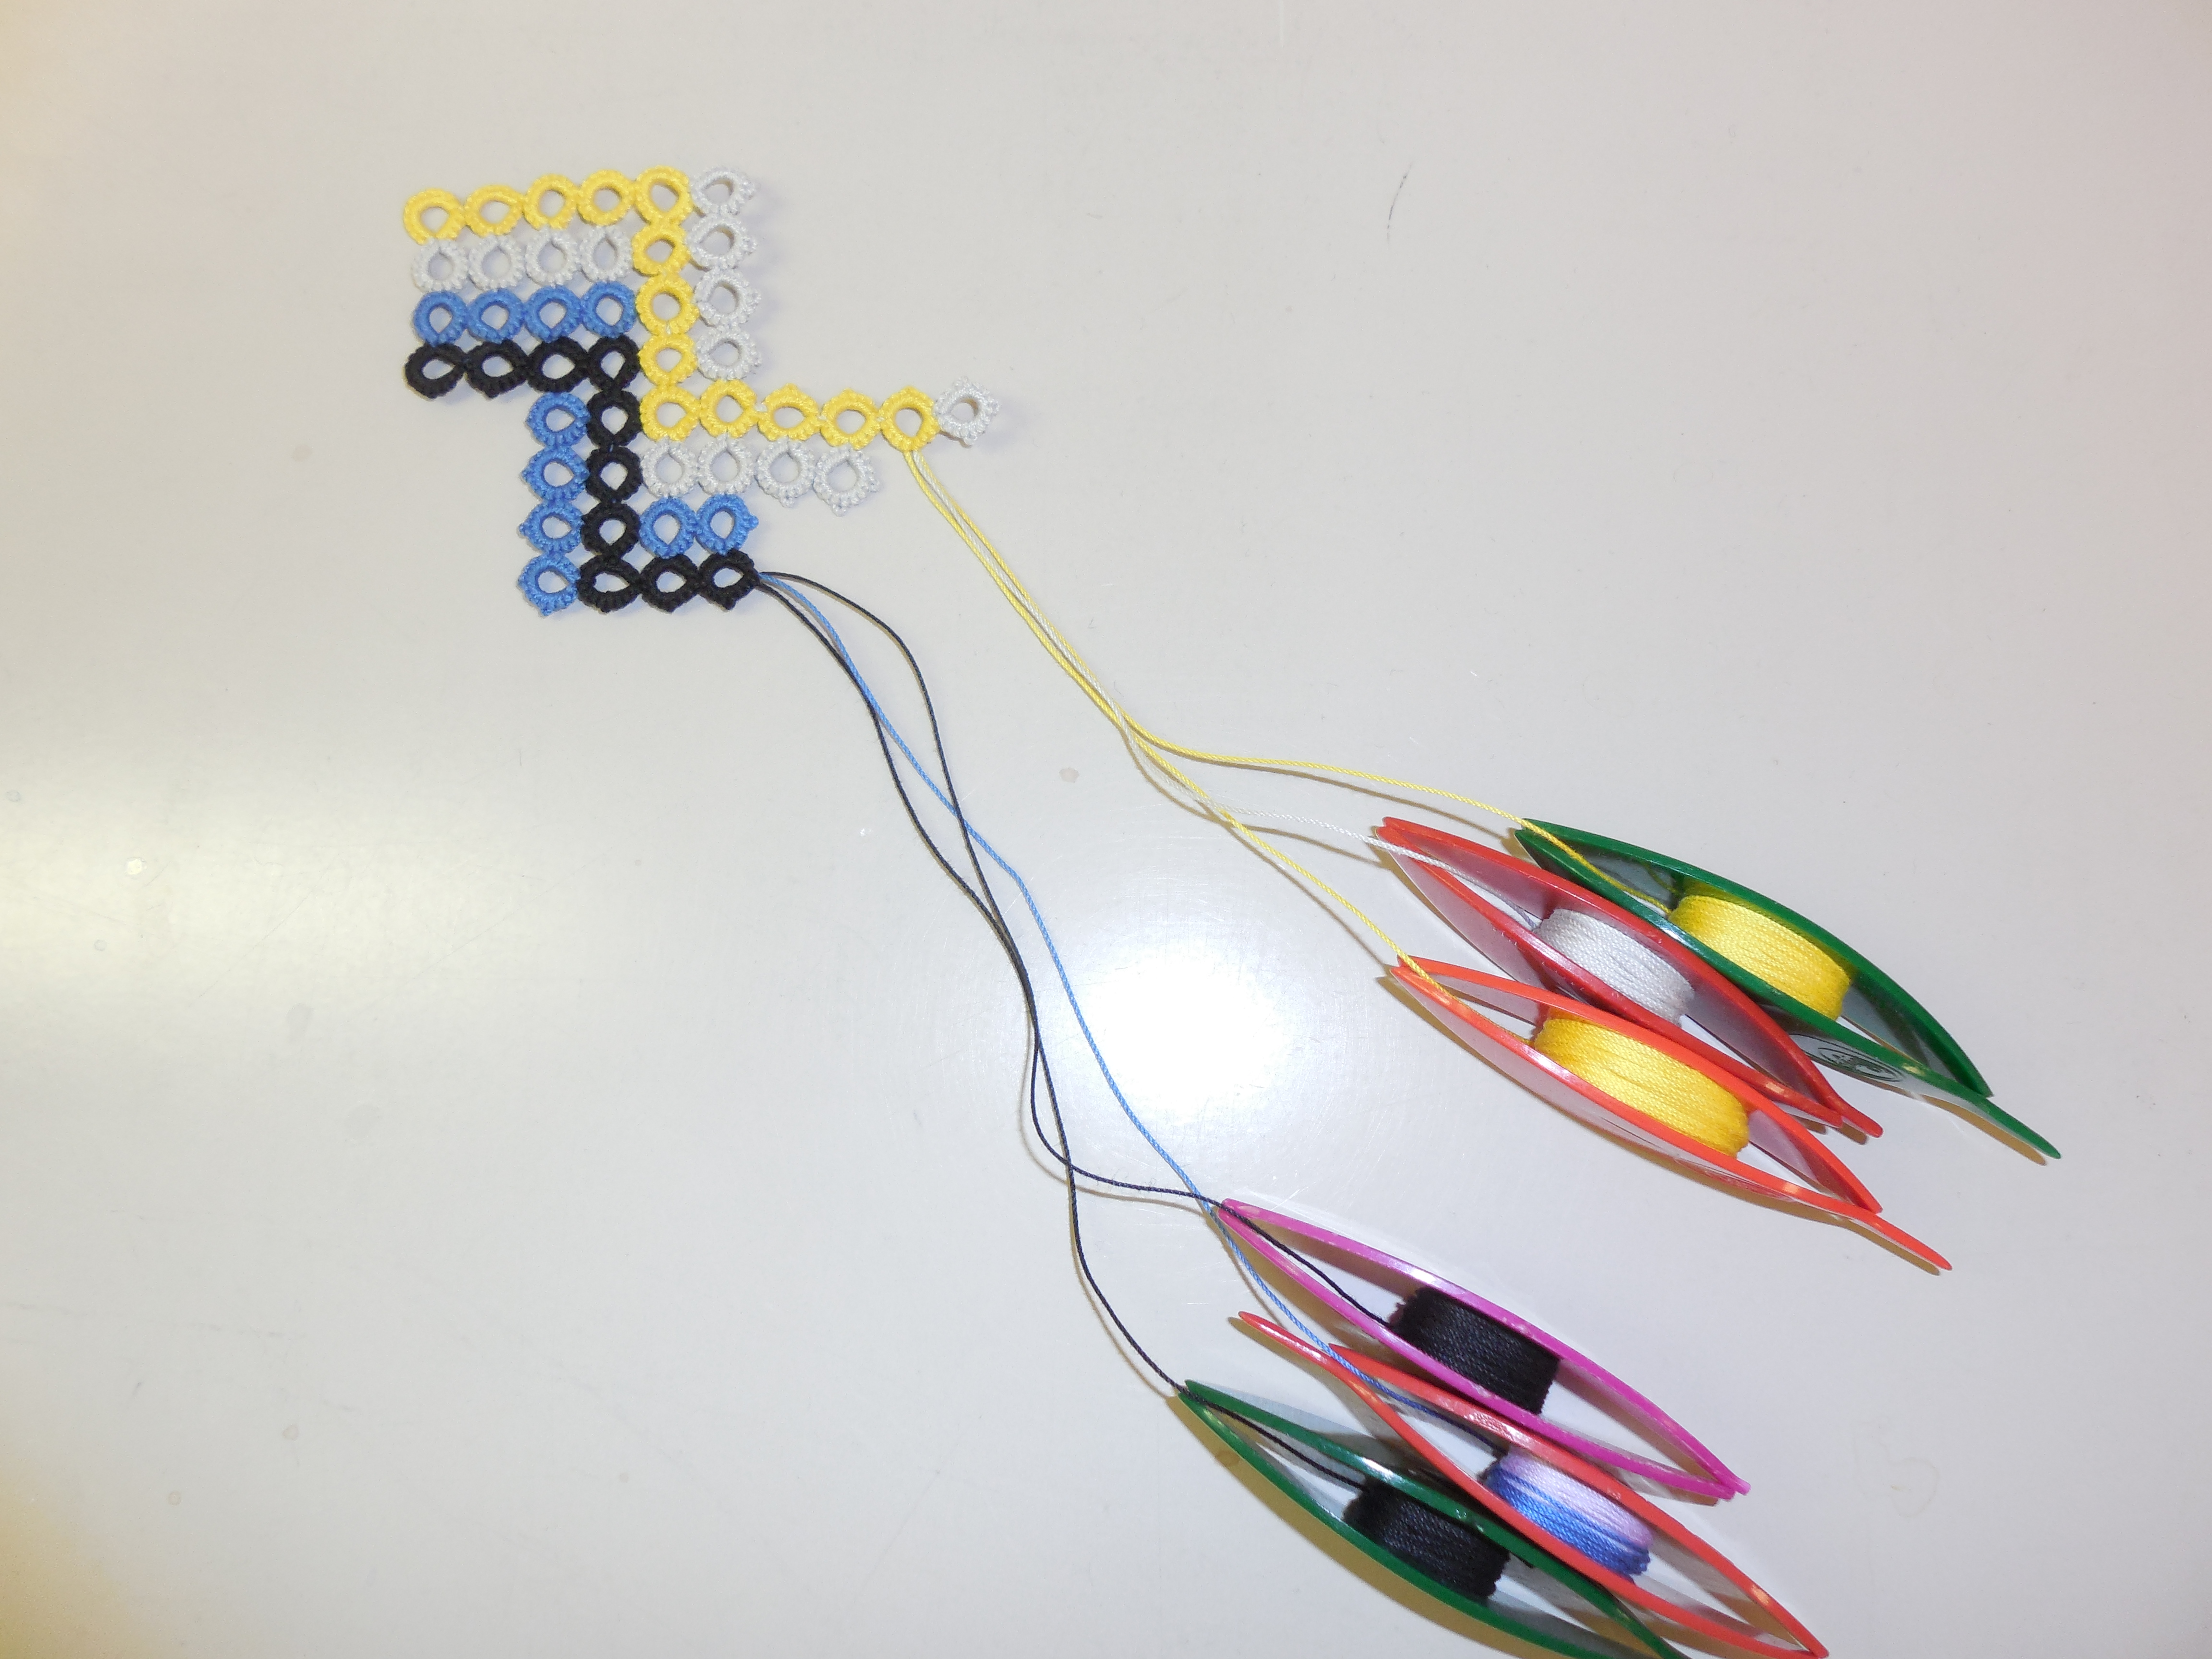
Here is a Quilt-Inspired Split Ring Tatting piece I have not posted yet. The top photo shows the piece as a work-in-progress–it shows a bit about how the piece is worked.
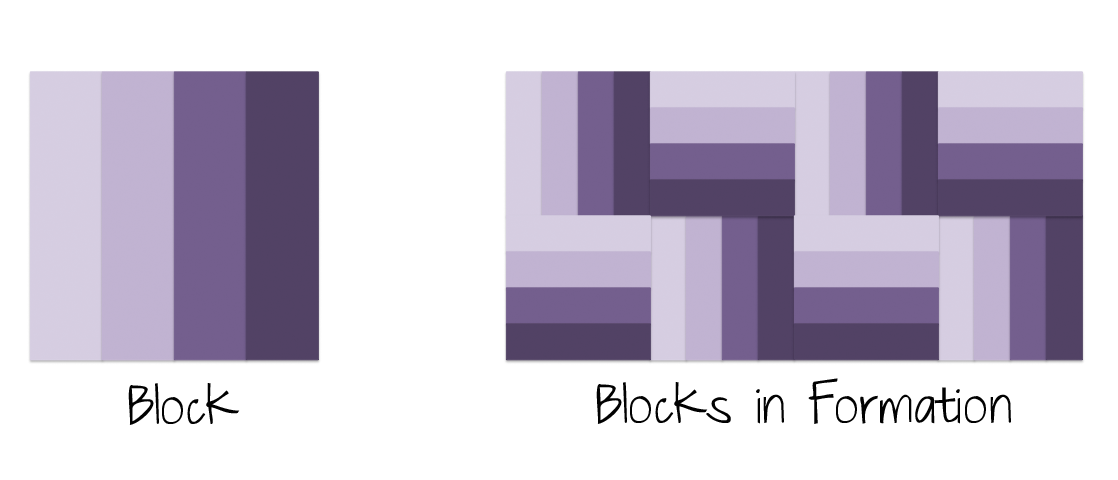
The middle picture is a diagram of how “Rail Fence” traditional quilt block works….it shows the individual quilt block and then how the quilt block looks/works when the basic design is repeated.
In traditional Split Ring Tatting Technique, the block would have to be make with each of the four colors as a separate ’round’ with only the darker color being ‘continuous’ from one block to another. However with the addition of Padded Tatting Technique to Split Ring Tatting Technique, I can tat a fairly large round continuously. It’s all about efficiency in tatting and minimizing/negating thread ends!
The top photo shows 2 rounds being tatted at the same time.
Each ’round’ requires 3 shuttles: 2 for the ‘base-color’ (yellow & black)–Split Ring Tatting Technique; 1 shuttle for the ‘padded-color’ (grey & blue).
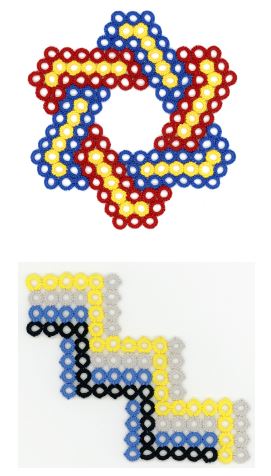
These are the two motifs that I used as the ‘challenge project’ at the recent 2015 IOLI Convention tatting class (Fun with Quilt-Inpired Split Ring Tatting) I taught. Both motifs utilize both Padded Tatting Technique & Split Ring Tatting Technique simultaneouly. The bottom motif shows “Rail Fence with several ‘repeats’ of the basic design element.